> ## Documentation Index
> Fetch the complete documentation index at: https://viewerdocs.planpoint.io/llms.txt
> Use this file to discover all available pages before exploring further.
# Form
The Form module allows you to create fully customizable forms to collect information from users interested in a specific unit. Form can be integrated directly into your project flow, supporting advanced customization, logic rules, previews, and multi-language translations.
This module is commonly used for:
* Lead capture
* Unit inquiries
* Reservation requests
* Contact and information collection
### Video Guide for Visual Learners
### Enabling the Form
To activate a form for your viewer:
1. In your dashboard, go to Sales & Marketing. From there, you will find the Form module. 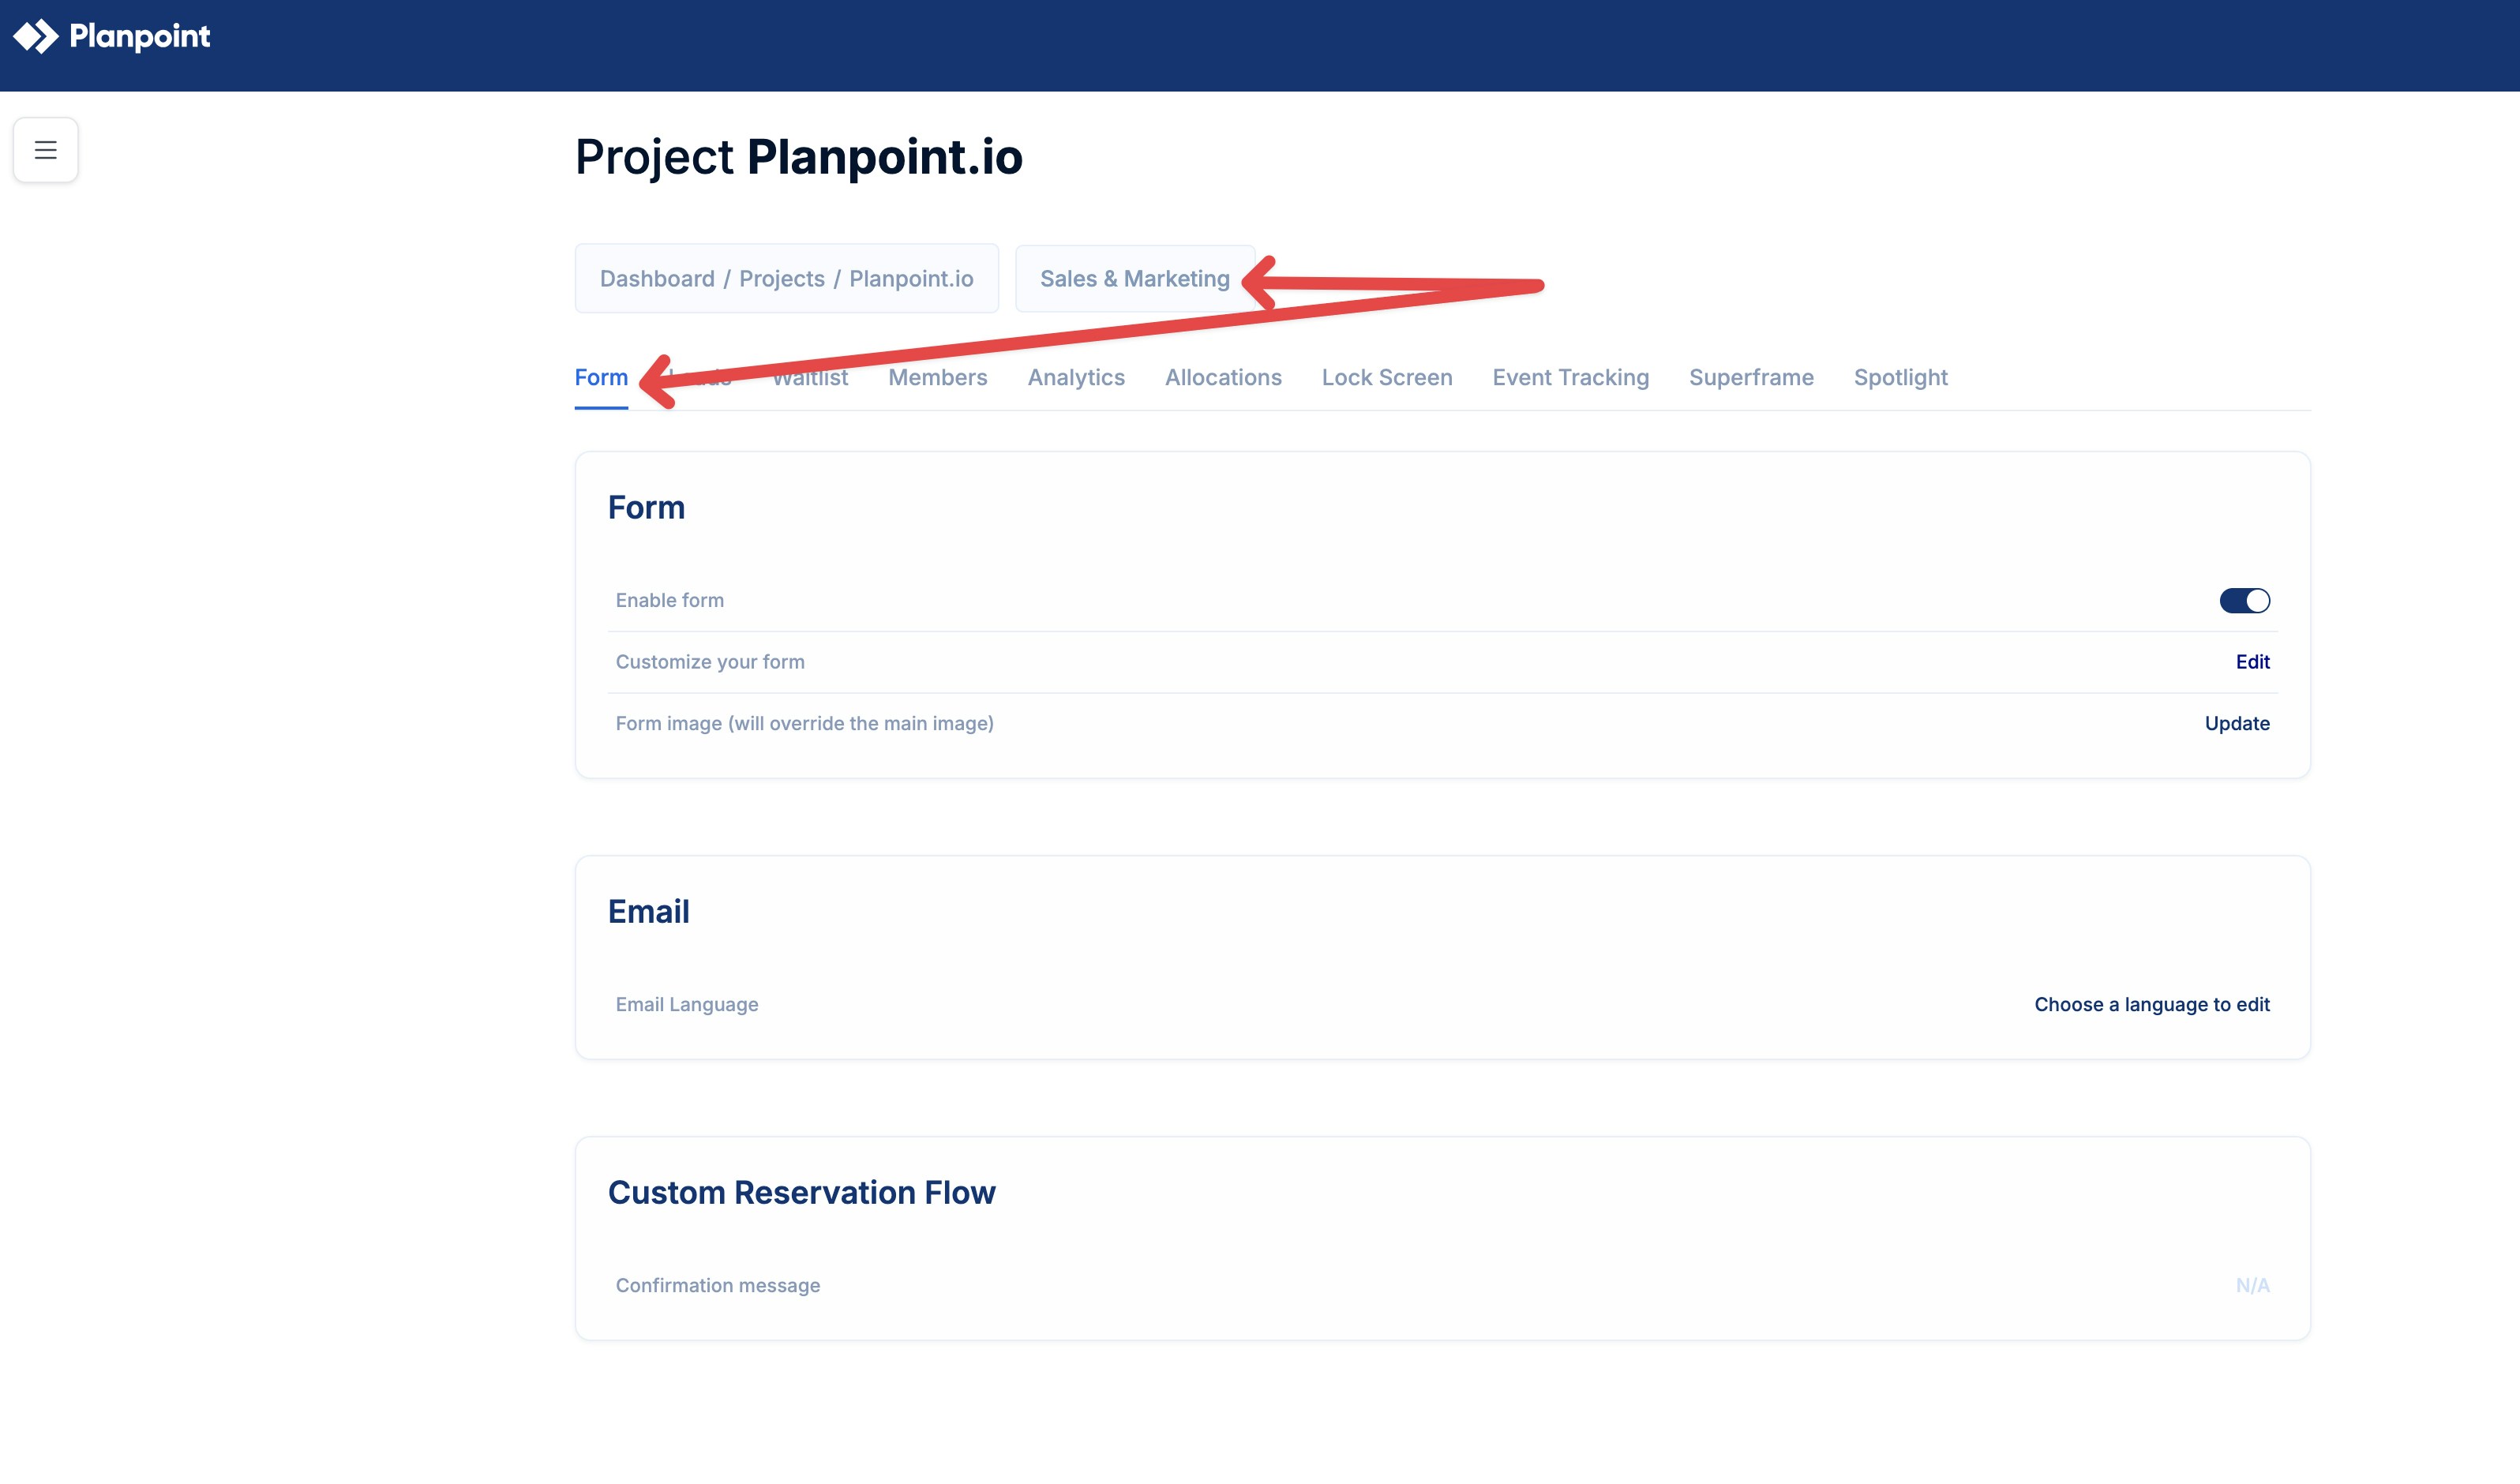 2. Toggle Enable form to ON.
Once enabled, the form becomes available in the project flow and can be customized.
## Form Configuration
To customize your form, click Edit to open the Form builder. The builder is divided into four main sections:
* Designer
* Preview
* Logic
* Translations
### Designer
The Designer tab is where you build and configure the structure of your form.
### Form Title and Description
* Form title: Defines the main heading of the form. Example: Request info about unit unitName Dynamic variables like unitName are supported.
* Title visibility: You can choose whether the title and description are visible to end users.
### Form Language
* Select the default language for the form. Available default languages are English, Spanish, French, and German.
### Display Settings
* Form display mode
* Editable: Users can fill in and submit the form.
* Read-only: Form is visible but cannot be edited.
* Form width mode
* Auto: Adjust automatically to layout.
* Static: Fixed width.
* Responsive: Adapts to different screen sizes.
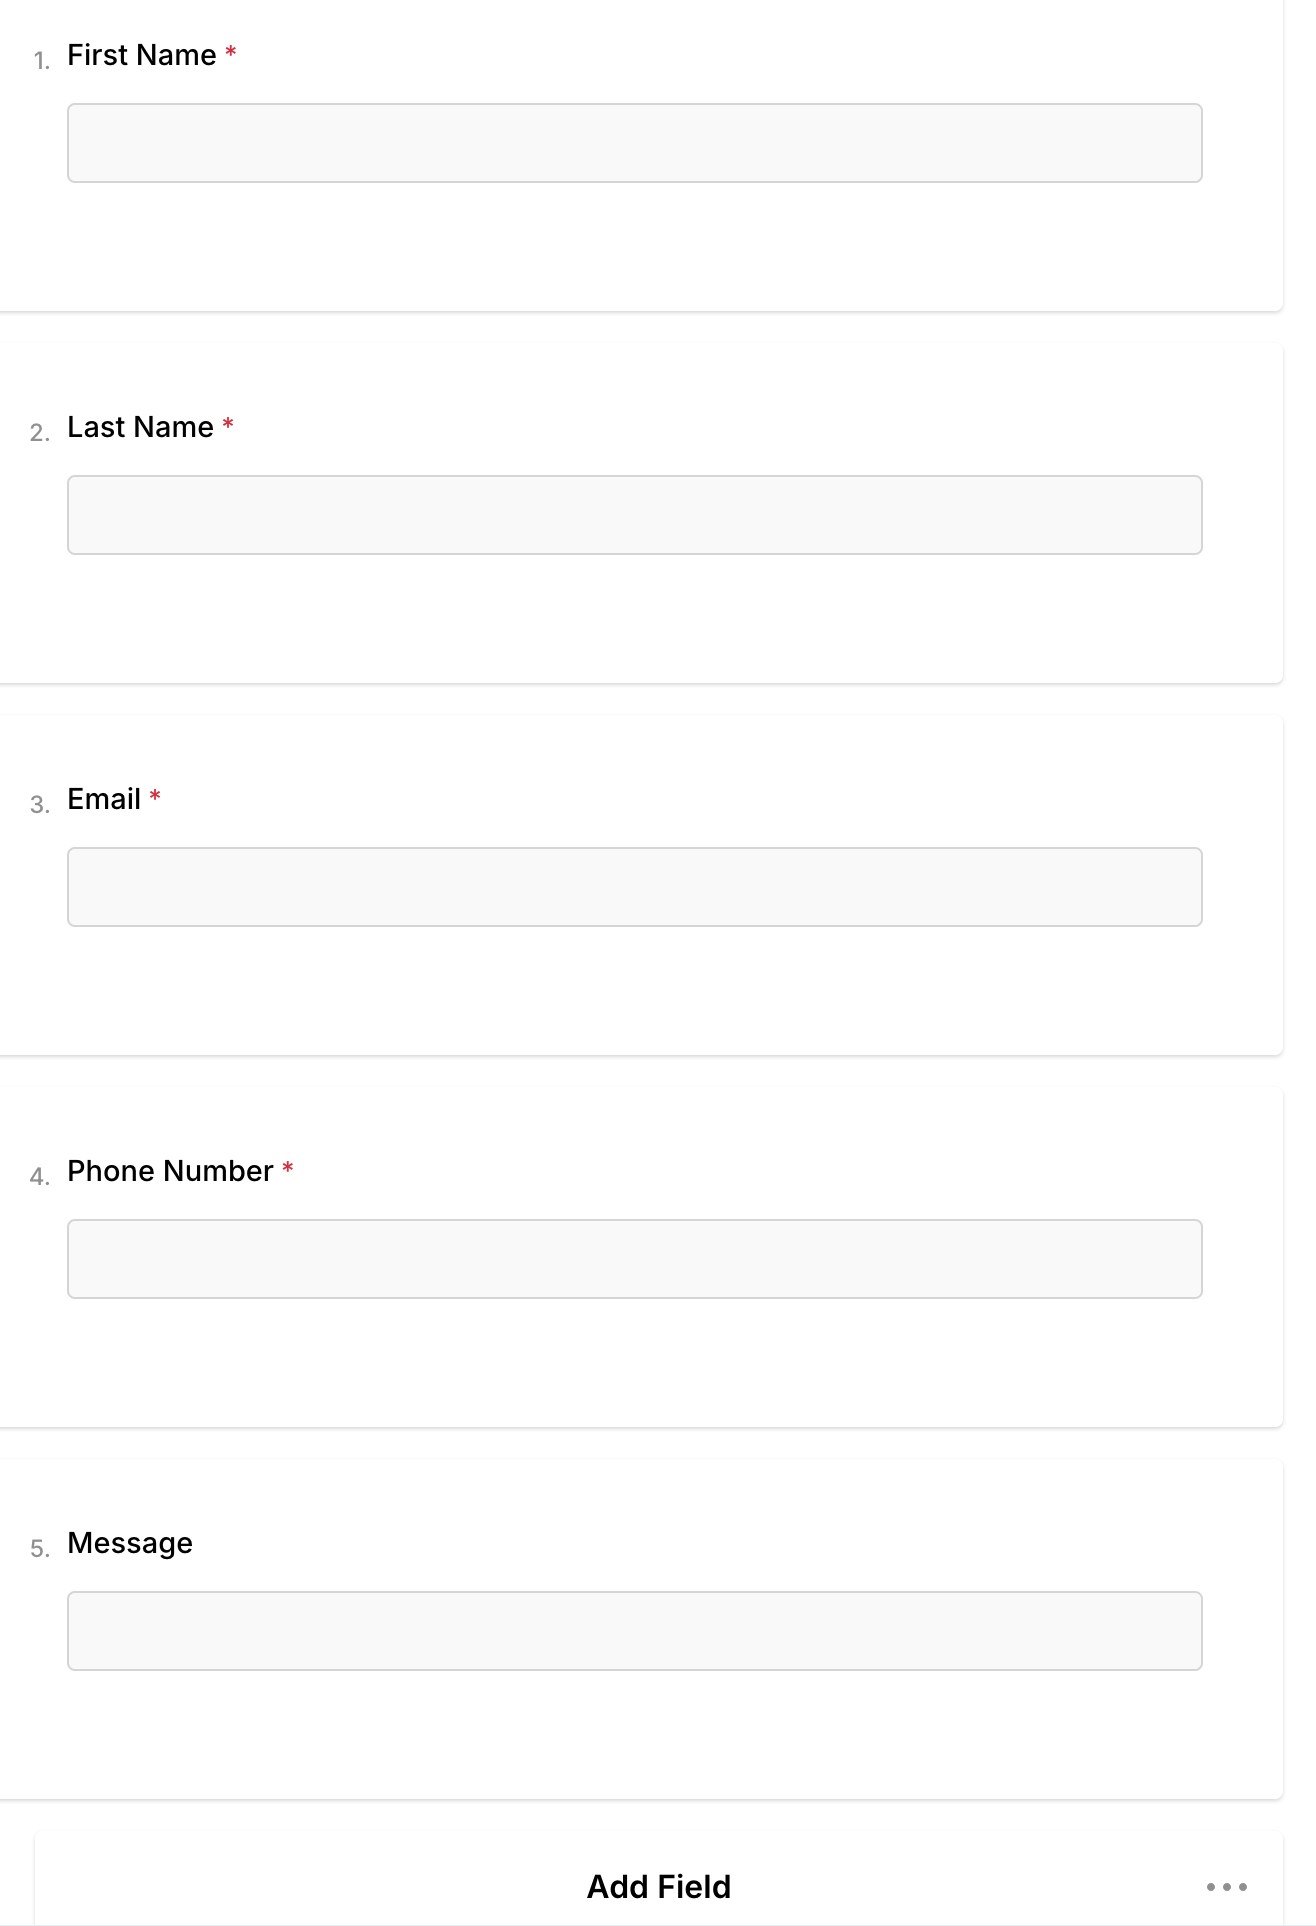
### Fields and Questions
You can add and configure multiple field types, including:
* Single-line input
* Long text
* Radio button groups
* Checkboxes
* Dropdowns
* Multi-select dropdowns
* Yes / No questions
Each field supports:
* Required / optional settings
* Custom labels
* Validation rules
**Example fields:**
2. Toggle Enable form to ON.
Once enabled, the form becomes available in the project flow and can be customized.
## Form Configuration
To customize your form, click Edit to open the Form builder. The builder is divided into four main sections:
* Designer
* Preview
* Logic
* Translations
### Designer
The Designer tab is where you build and configure the structure of your form.
### Form Title and Description
* Form title: Defines the main heading of the form. Example: Request info about unit unitName Dynamic variables like unitName are supported.
* Title visibility: You can choose whether the title and description are visible to end users.
### Form Language
* Select the default language for the form. Available default languages are English, Spanish, French, and German.
### Display Settings
* Form display mode
* Editable: Users can fill in and submit the form.
* Read-only: Form is visible but cannot be edited.
* Form width mode
* Auto: Adjust automatically to layout.
* Static: Fixed width.
* Responsive: Adapts to different screen sizes.
### Fields and Questions
You can add and configure multiple field types, including:
* Single-line input
* Long text
* Radio button groups
* Checkboxes
* Dropdowns
* Multi-select dropdowns
* Yes / No questions
Each field supports:
* Required / optional settings
* Custom labels
* Validation rules
**Example fields:**
 ### Logo and Header
You can upload a logo to display in the form header, helping mantain brand consistency.
### Navigation and Pages
* Organize the form into multiple pages
* Control navigation between pages
* Define the overall flow of the form
### Validation
Set validation rules to ensure users provide correct and complete information (e.g. required fields, email format).
### Thank you page
After submission, users are shown a confirmation screen. You can customize:
* Thank you message
* HTML markup
* Button text
## Preview
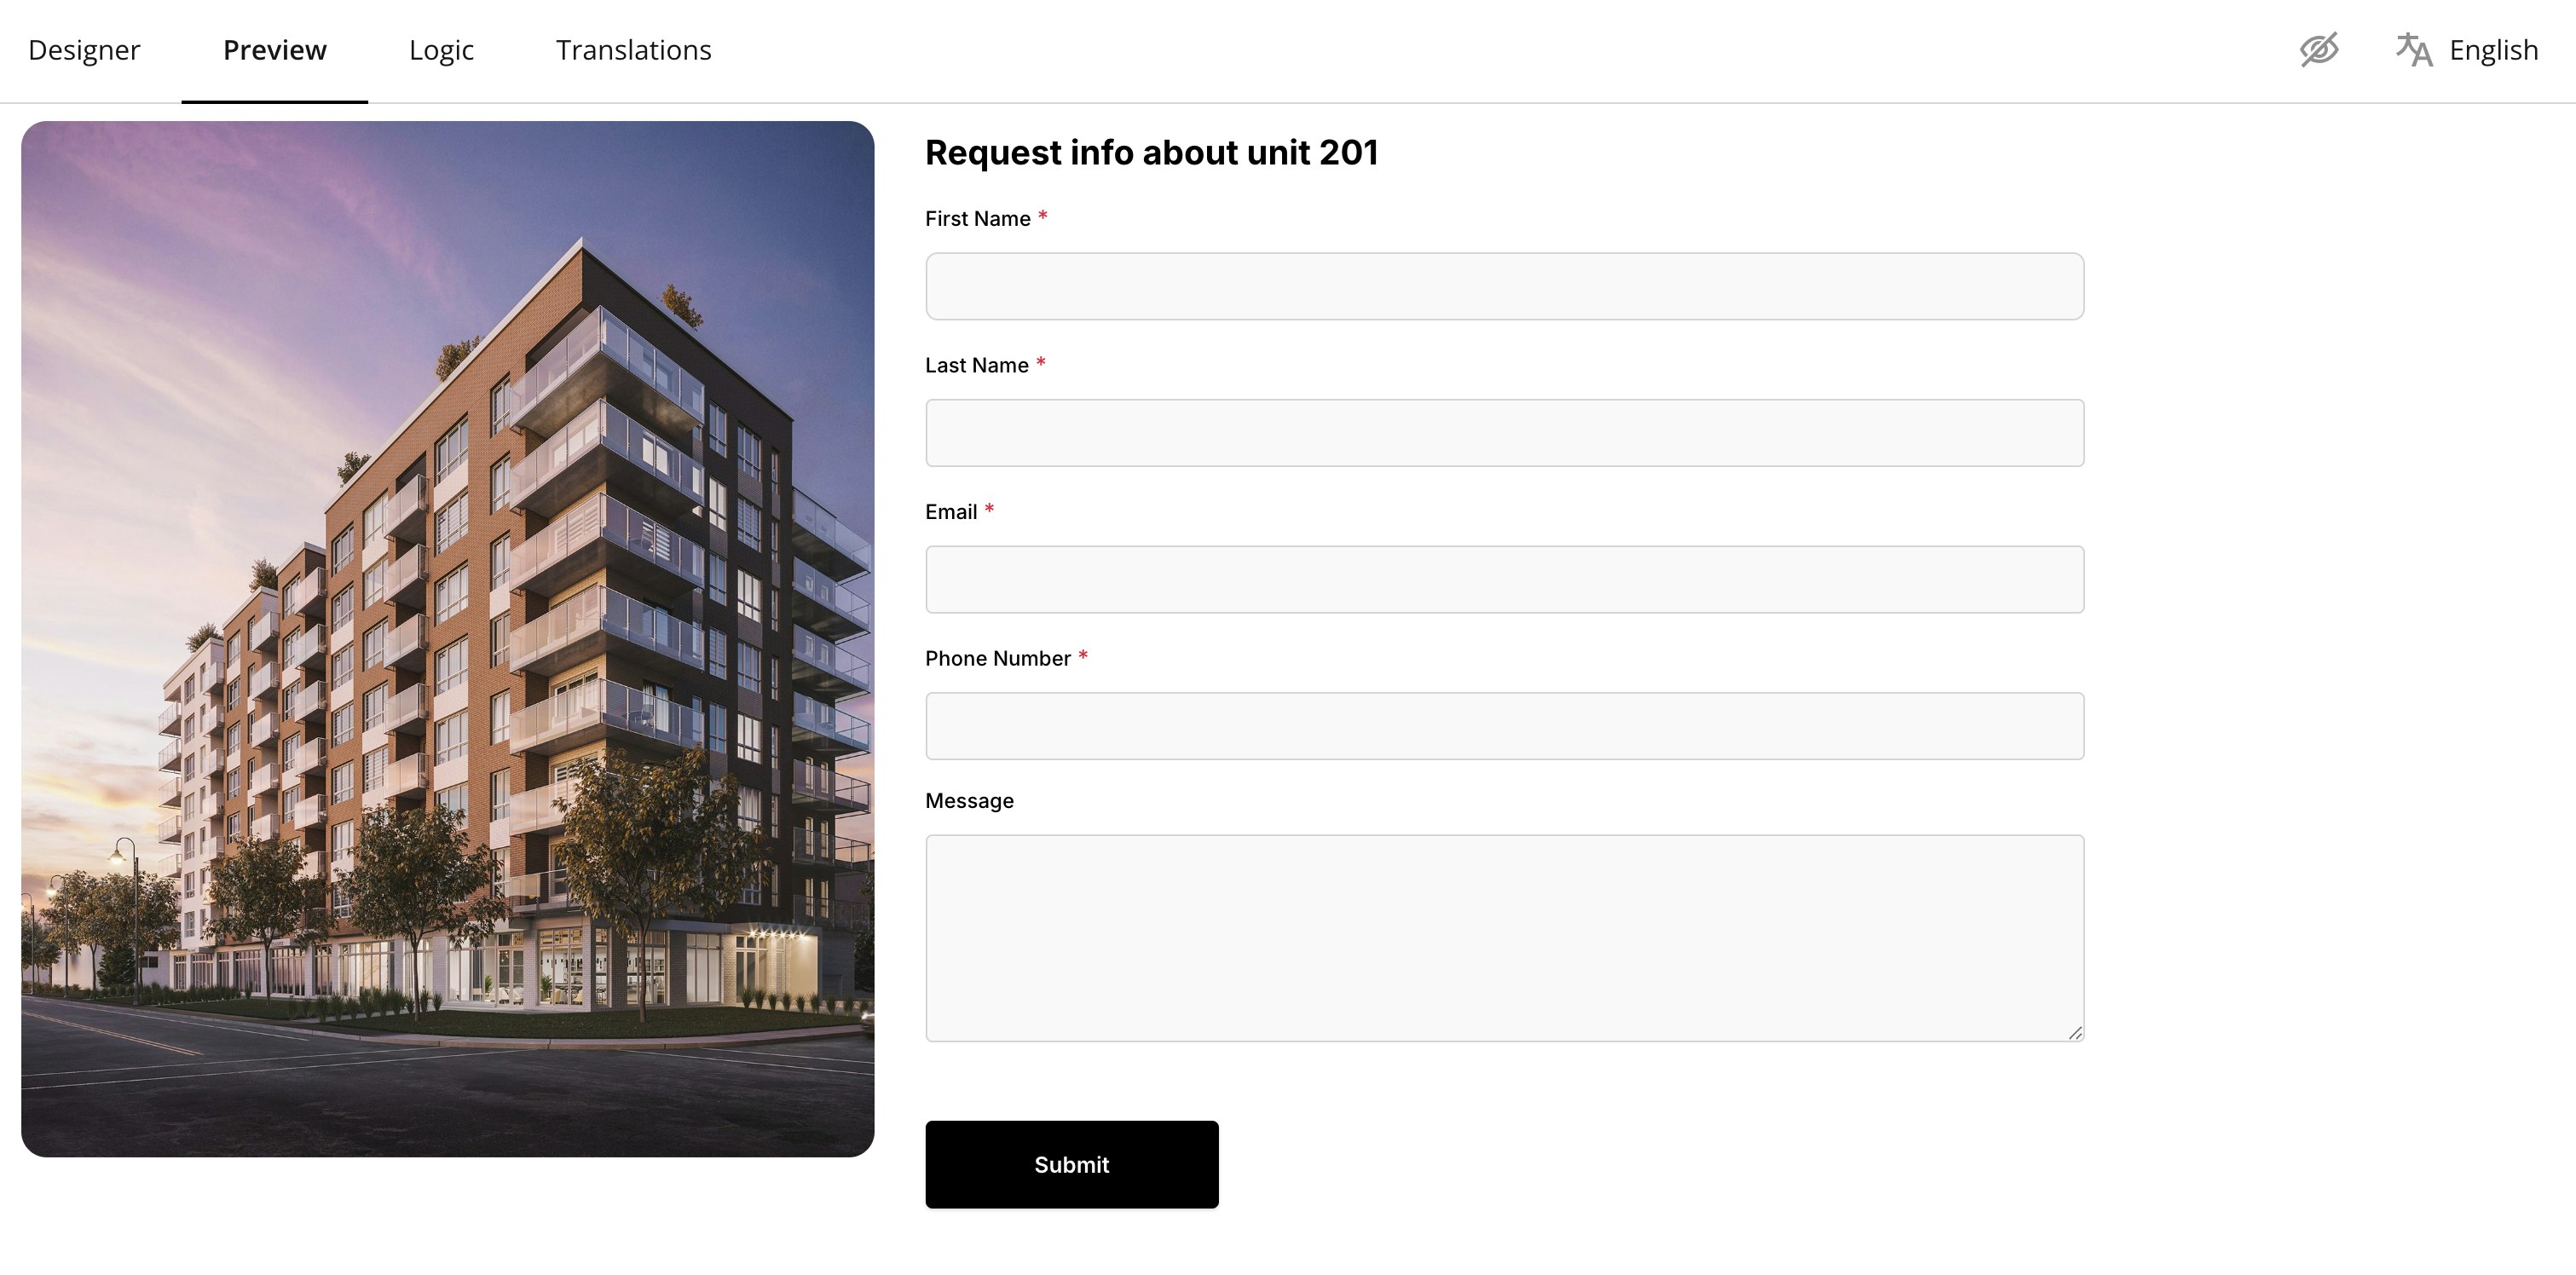
The Preview tab allows you to see exactly how the form will appear to end users before publishing.
* View the full layout
* Test field behaviour
* Confirm images, text, and button placement
This is especially useful when testing different screen sizes and layouts.
### Logo and Header
You can upload a logo to display in the form header, helping mantain brand consistency.
### Navigation and Pages
* Organize the form into multiple pages
* Control navigation between pages
* Define the overall flow of the form
### Validation
Set validation rules to ensure users provide correct and complete information (e.g. required fields, email format).
### Thank you page
After submission, users are shown a confirmation screen. You can customize:
* Thank you message
* HTML markup
* Button text
## Preview
The Preview tab allows you to see exactly how the form will appear to end users before publishing.
* View the full layout
* Test field behaviour
* Confirm images, text, and button placement
This is especially useful when testing different screen sizes and layouts.
 ## Logic
The logic tab lets you define conditional rules that control the form flow.
### Logic Rules
You can create rules based on user input to:
* Show or hide specific questions
* Control navigation between pages
* Customize the user journey dynamically
To create a rule:
1. Go to Logic
2. Click Add New Rule
3. Define the condition and resulting action
## Logic
The logic tab lets you define conditional rules that control the form flow.
### Logic Rules
You can create rules based on user input to:
* Show or hide specific questions
* Control navigation between pages
* Customize the user journey dynamically
To create a rule:
1. Go to Logic
2. Click Add New Rule
3. Define the condition and resulting action 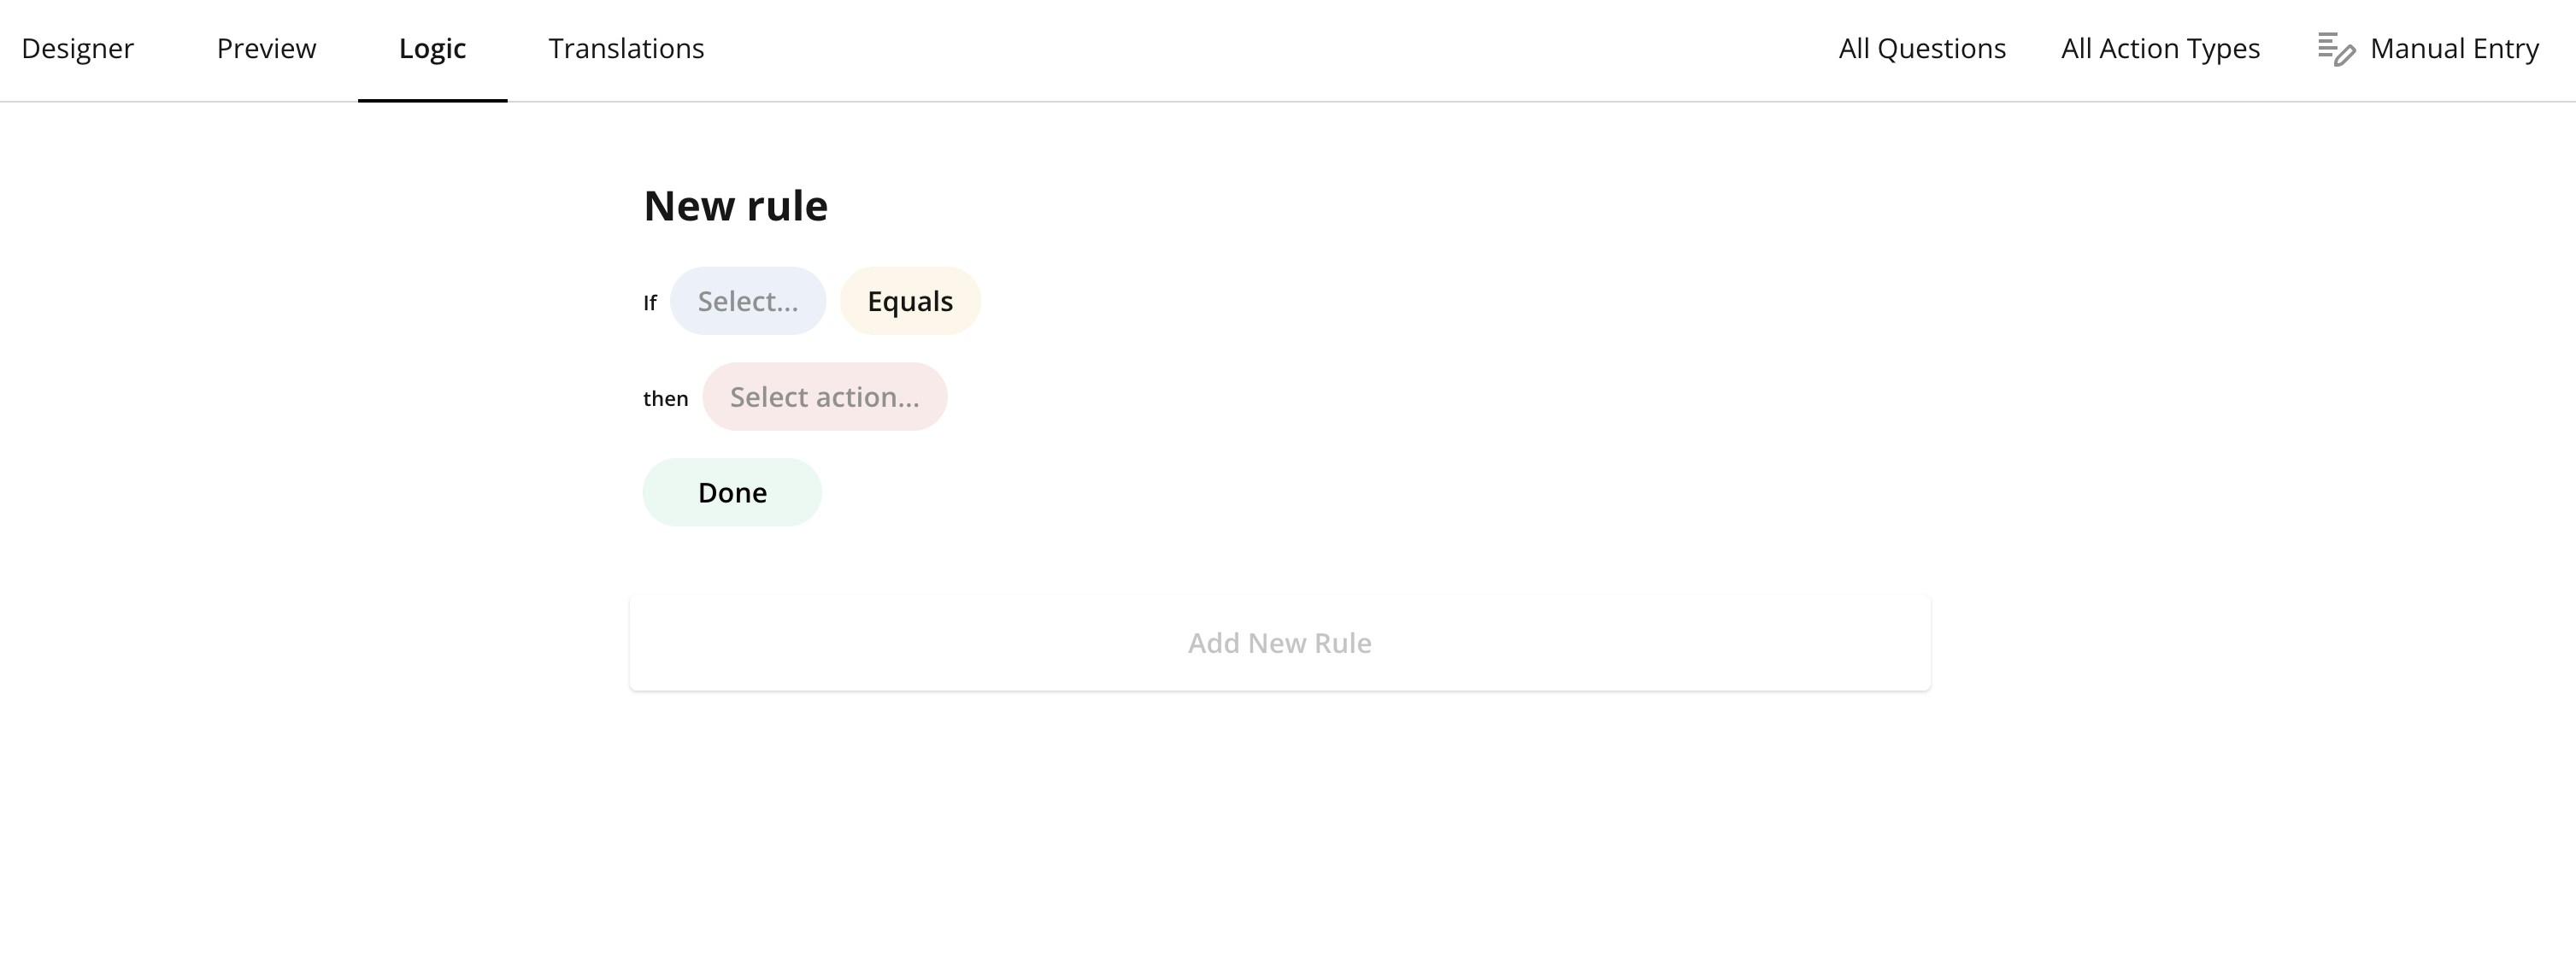 If no rules are created, the form follows a linear flow by default.
## Translations
The Translations tab aloows you to manage multi-language versions of the form.
### Supported Translations
You can translate:
* Form title
* Button text
* Than you page content
* Questions labels
If no rules are created, the form follows a linear flow by default.
## Translations
The Translations tab aloows you to manage multi-language versions of the form.
### Supported Translations
You can translate:
* Form title
* Button text
* Than you page content
* Questions labels 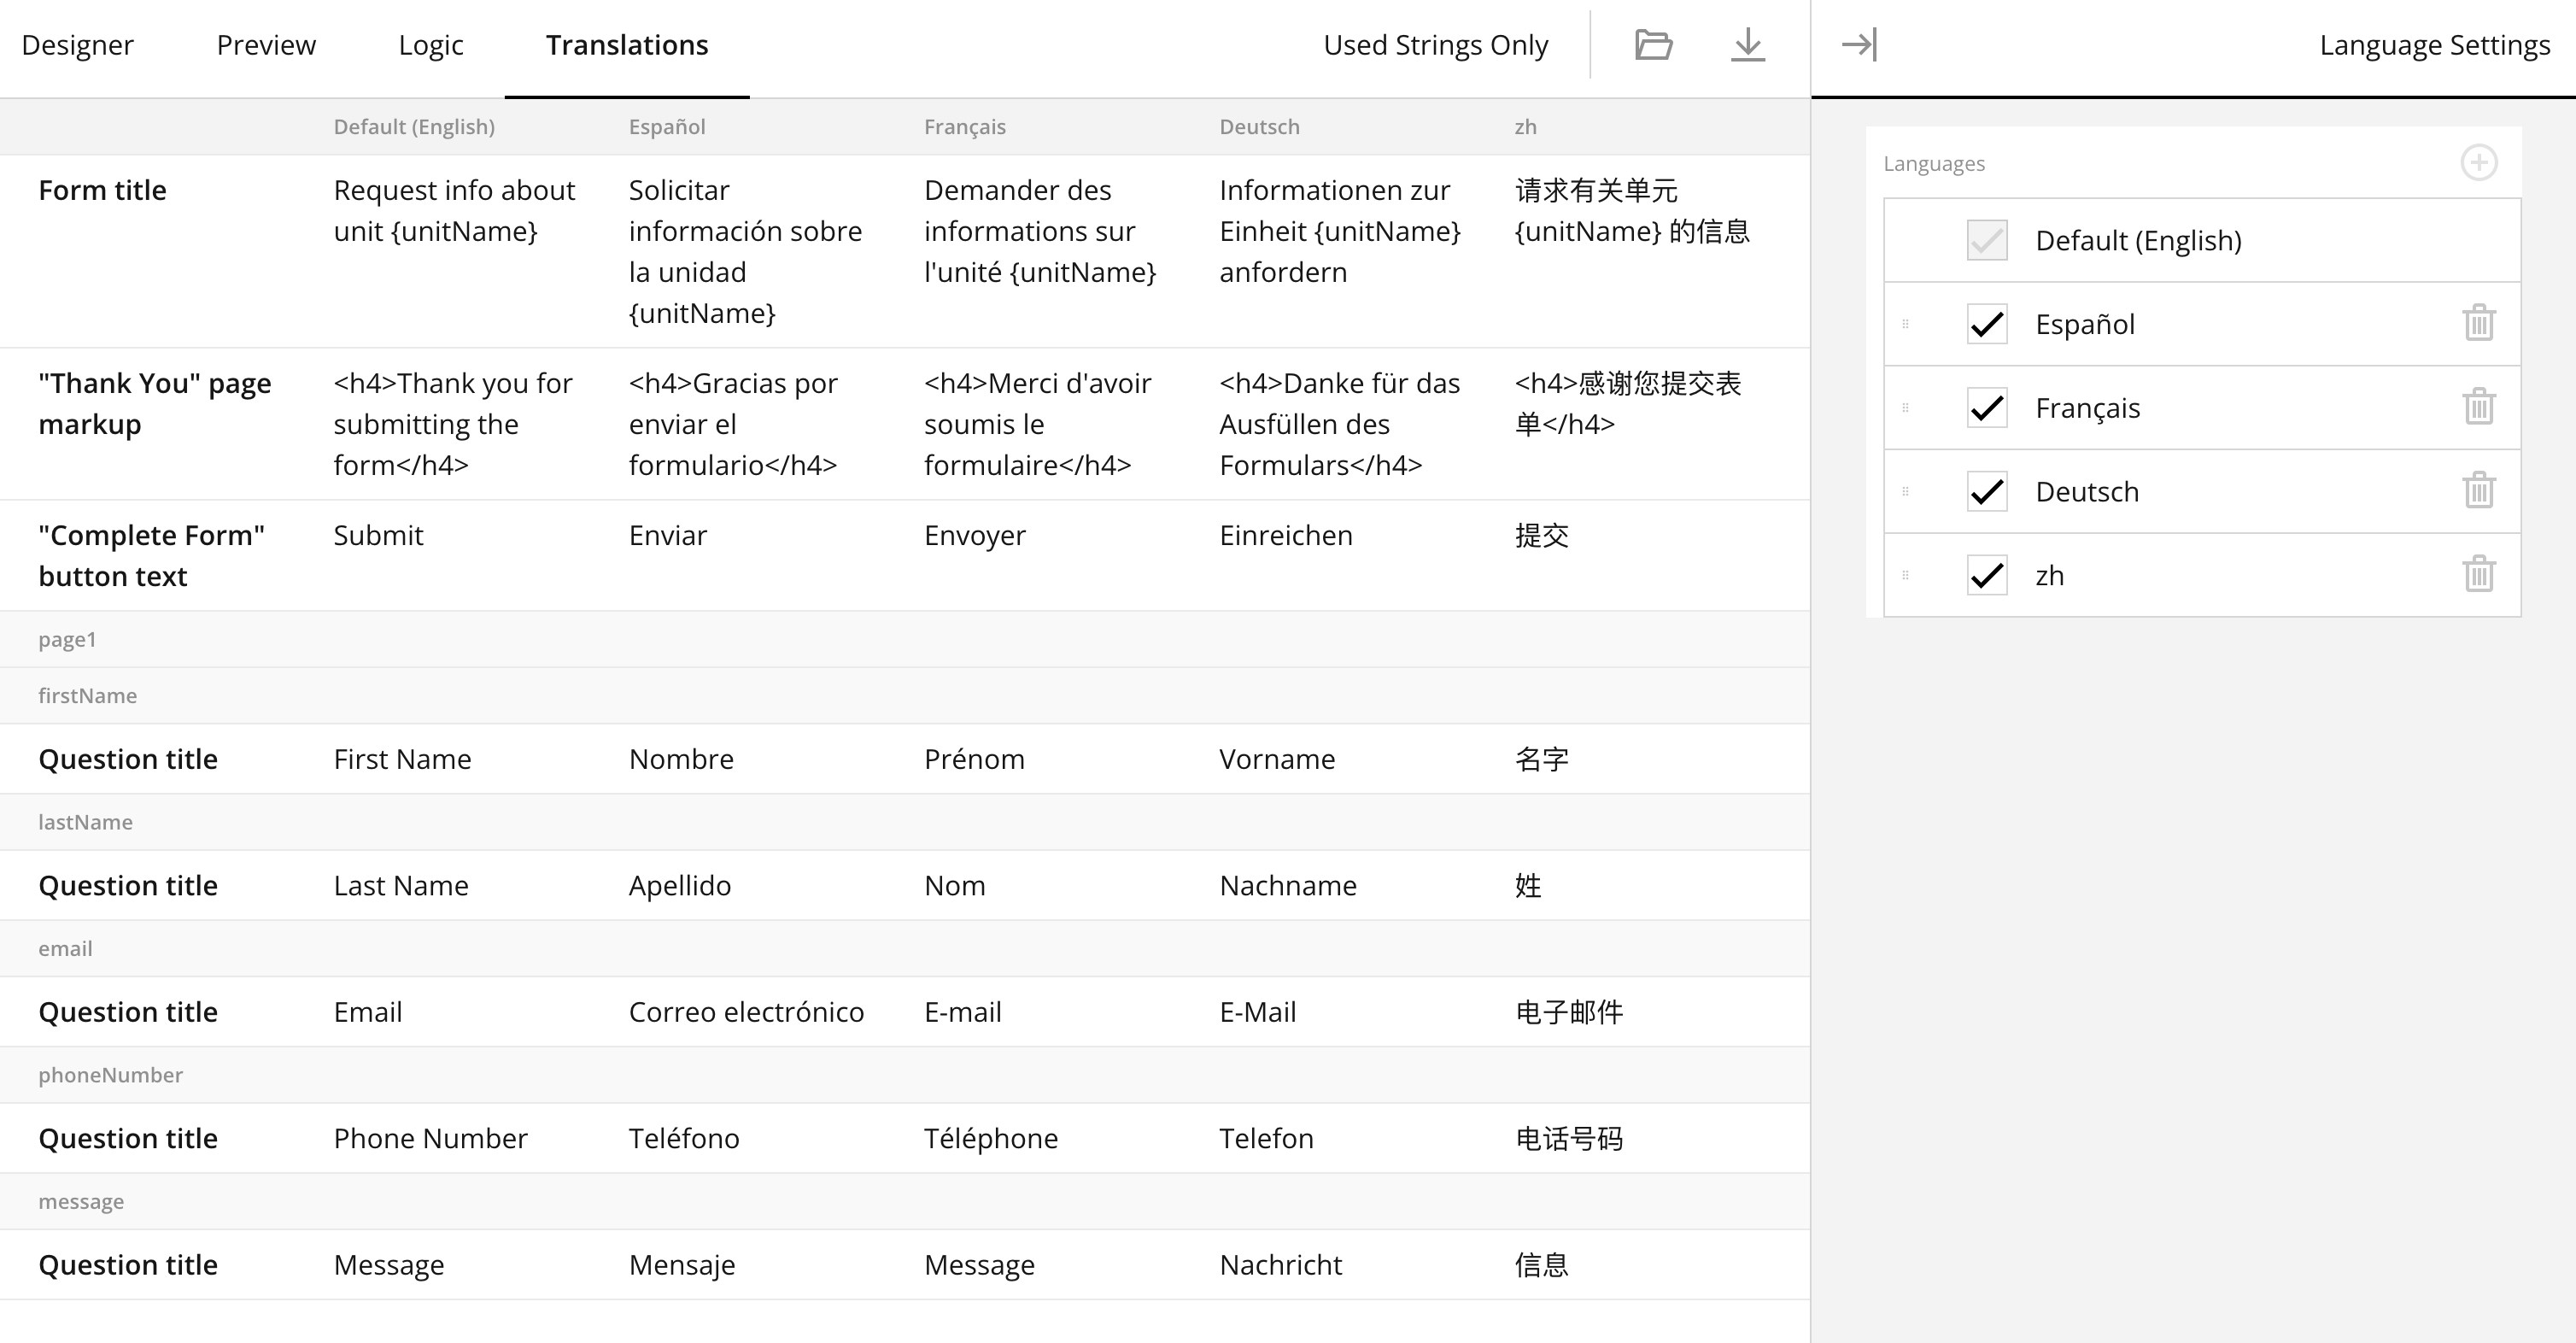 Each language is managed side by side for easy comparison and editing.
### Language Management
* Add or remove languages
* Enable only selected languages
* Keep English as default fallback
This makes Forms ideal for international or multi-region projects.
## Form Image
You can upload a Form Image that will override the main project image and be displayed alongside the form in preview and live views.
## Email Settings
Forms support email language configuration, allowing notification or automated messages to match the selected form language.
## Custom Reservation Flow
For advanced use cases, you can define a Custom Reservation Flow, including a custom confirmation message after submission.
If no custom message is set, the default confirmation behavior is applied.
Best Practices:
* Keep forms short to improve conversion rates
* Use required fileds only when neccessary
* Always preview before enabling the form
* Use translations to improve accessibility
* Leverage logic rules for personalized flows
Each language is managed side by side for easy comparison and editing.
### Language Management
* Add or remove languages
* Enable only selected languages
* Keep English as default fallback
This makes Forms ideal for international or multi-region projects.
## Form Image
You can upload a Form Image that will override the main project image and be displayed alongside the form in preview and live views.
## Email Settings
Forms support email language configuration, allowing notification or automated messages to match the selected form language.
## Custom Reservation Flow
For advanced use cases, you can define a Custom Reservation Flow, including a custom confirmation message after submission.
If no custom message is set, the default confirmation behavior is applied.
Best Practices:
* Keep forms short to improve conversion rates
* Use required fileds only when neccessary
* Always preview before enabling the form
* Use translations to improve accessibility
* Leverage logic rules for personalized flows