If you’re looking for a simple connection between your software and Planpoint, you can look into our API.

Planpoint SDK, or software development kit, offers a collection of tools for developers to integrate Planpoint interfaces to their custom web projects. With a few lines of code, you can enhance your project with interactive and modern user experiences.

The Planpoint SDK facilitates rendering by serving pre-configured React components that allow easy integration. In this section, we will provide general information on how to configure our SDK to implement Plainpoint interfaces into your JavaScript software.

Getting Started

In your React project, begin by importing all components of Planpoint SDK:

import * as Planpoint from 'planpoint-sdk';

You can alternatively import individual components at a time. For example, importing the project component:

import { Project } from 'planpoint-sdk/core';

Planpoint Views

The Plainpoint SDK provides a set of views ready to integrate to your websites. Plainpoint will serve ready-to-use graphical components, while handling all processing and data management.

There are four core views which can be rendered via the SDK. Let’s have a look at them and their corresponding integrations.

1. Project View

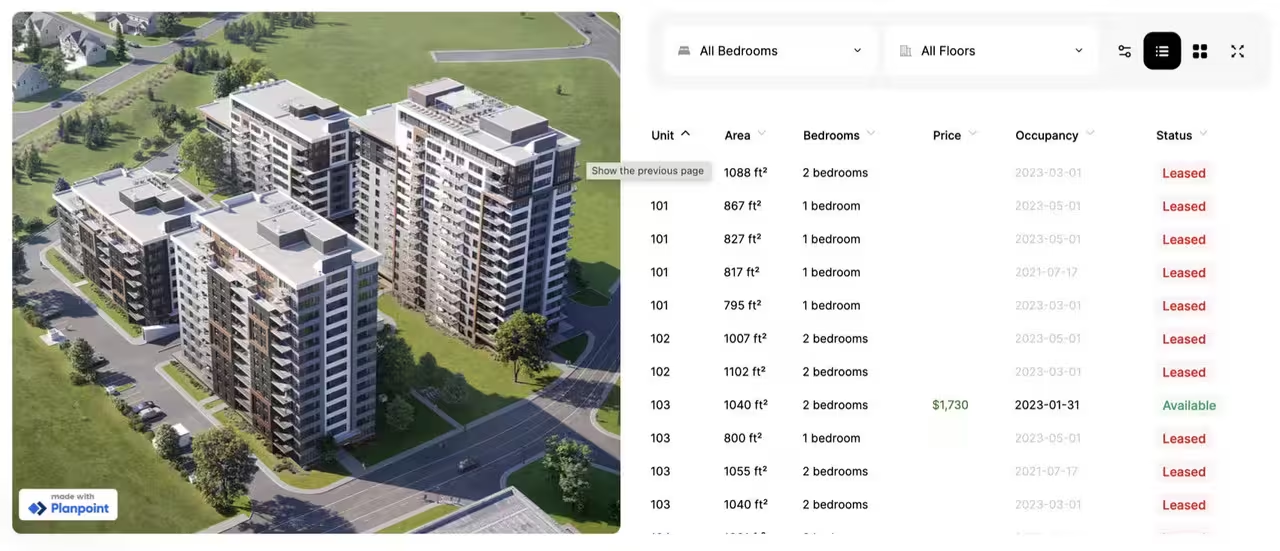
The project view provides a list of current projects with relevant data, including the area, occupancy, price, and others. Integrating the project view in your project requires the ID of a project that has previously been configured in the dashboard. Loading a project looks like this:
import * as Planpoint from 'planpoint-sdk';
import { Project } from 'planpoint-sdk/core';
const app = <Project id="602e27b829f590001f83a5a2" />
const renderContext = Planpoint.createRenderContext();
await renderContext.render(app);

Check out the result:

2. Group View

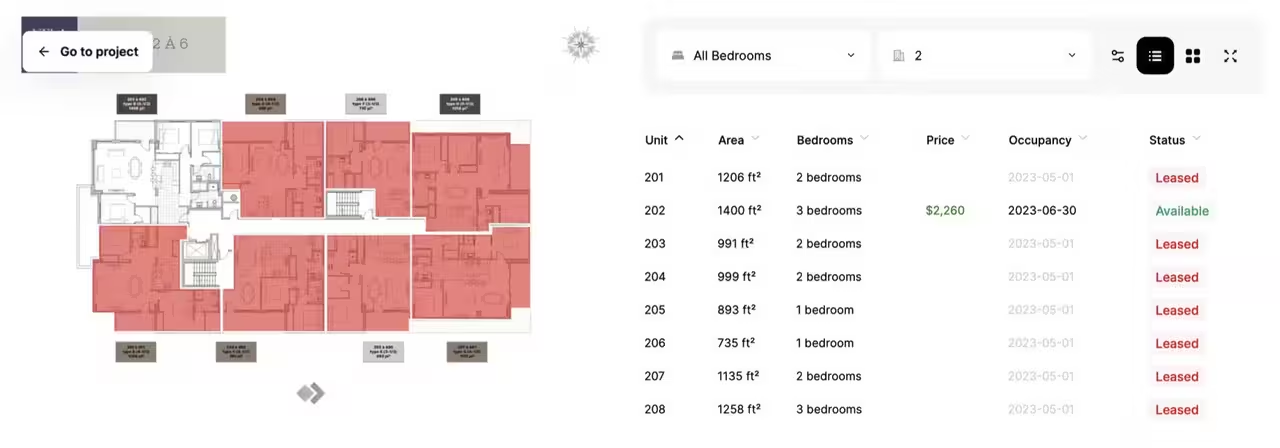
The group view allows to inspect individual groups with their corresponding data, including the number of bedrooms, occupancy, status, and others. In a similar way as presented above, you can integrate a group view into your project.

Group views share the exact listener configuration with project views - the single difference being the nature of the entity that’s passed in stage and entity events. Instead of passing floor ids to stage and entity events, Group Views will pass project ids instead.

Here’s how it looks:

3. Floor View

The Plainpoint SDK allows you to inspect individual floors and integrate this view directly to your website application. In a similar fashion as other views, all relevant data is presented in such a way to improve readability.

Floor Views - just like Group Views - share their event configuration with Project views. Instead of passing floor ids to stage and entity events, Floor Views will pass unit ids instead.

Here’s how it looks:

4. Unit View

The unit view presents singular units with all its relevant data. To get started, you can import a single unit into your project:

import * as Planpoint from 'planpoint-sdk';
import { Unit } from 'planpoint-sdk/core';
const app = <Unit projectId="602e27b829f590001f83a5a2" unitName="202" />
const renderContext = Planpoint.createRenderContext();
await renderContext.render(app);

Here’s how it looks:

In contrast to the first three views, Unit View defines it’s own event categories as follows:

  1. action events correspond to unit actions in the form of buttons above the unit gallery.
  2. shortlist events correspond to interactions with the shortlist feature in the top right corner.

Example Event Management Listener configuration for a unit view:

import * as Planpoint from 'planpoint-sdk'; 
import { Unit } from 'planpoint-sdk/core'; 
const handleActionClick = ({ action }) => { /* ... */ } 
const handleShortlistToggle = ({ isShortlisted }) => { /* ... */ } 
const listenerConfig = { action: { click: handleActionClick }, shortlist: { click: handleShortlistToggle, } } 
const app = (<Unit
projectId="602e27b829f590001f83a5a2"
unitName="202"
listeners={listenerConfig}/> 
 ) 
const renderContext = Planpoint.createRenderContext(); 
await renderContext.render(app);

Event Management

Each view rendered with the SDK provides a unique list of events and triggers. You can pass a listener configuration to each component from planpoint-sdk/core to listen for and respond to said events.

Project views provide different kinds of events:

  1. stage events will listen to events across the image displayed on the right. There’s a hover and click event for the floors displayed on the project. Each event will carry the id of the floor in scope.
  2. filter events will fire whenever users click any of the available filter dropdowns along with filters hidden in the filter menu. Each filter event will carry the name of the filter, the previous value as well as the new value.
  3. view events will fire whenever users toggle full screen, grid or list view. Each event will carry the name of the previous and current view.
  4. entity events will fire whenever users hover over or click any of the entities listed in the table on the right of the screen. Each event will carry the id of the entity in scope.

Example listener configuration for a project view:

import * as Planpoint from 'planpoint-sdk';
import { Project } from 'planpoint-sdk/core';
const handleStageHover = ({ floorId }) => { /* ... */ }
const handleStageClick = ({ floorId }) => { /* ... */ }
const handleFilter = ({ name, valueBefore, valueAfter }) => { /* ... */ }
const handleViewSwitch = ({ oldView, newView }) => { /* ... */ }
const handleListHover = ({ floorId }) => { /* ... */ }
const handleListClick = ({ floorId }) => { /* ... */ }
const listenerConfig = {
        stage: {
                hover: handleStageHover,
                click: handleStageClick
}, filter: {
},
click: handleFilter,
        view: {
                click: handleViewSwitch,
}, entity: {
                hover: handleListHover,
                click: handleListClick
} }
const app = <Project id="602e27b829f590001f83a5a2" listeners=
{listenerConfig} />
const renderContext = Planpoint.createRenderContext();
await renderContext.render(app);