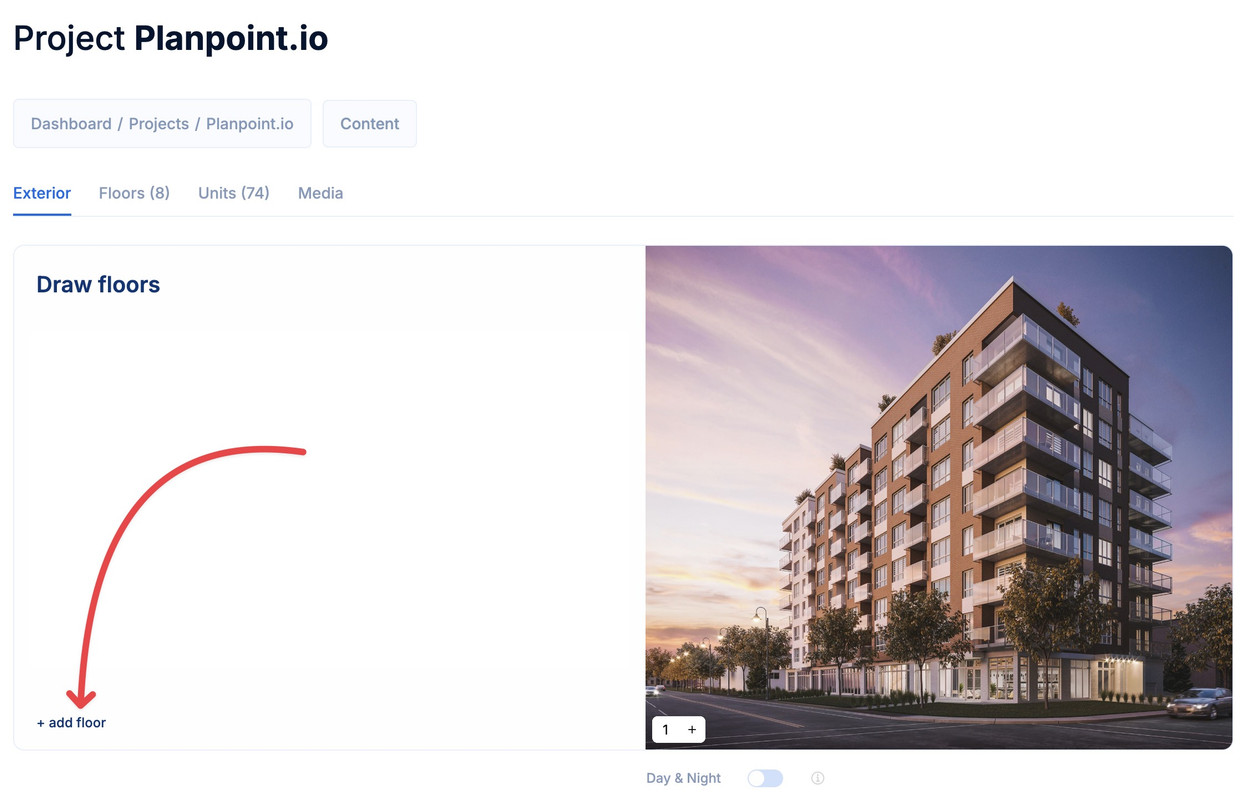
Your project currently indicates there are no floors added, which is expected at this stage. The next step involves initiating the addition of floors to your project. Simply click on add floor.
2
Step 2
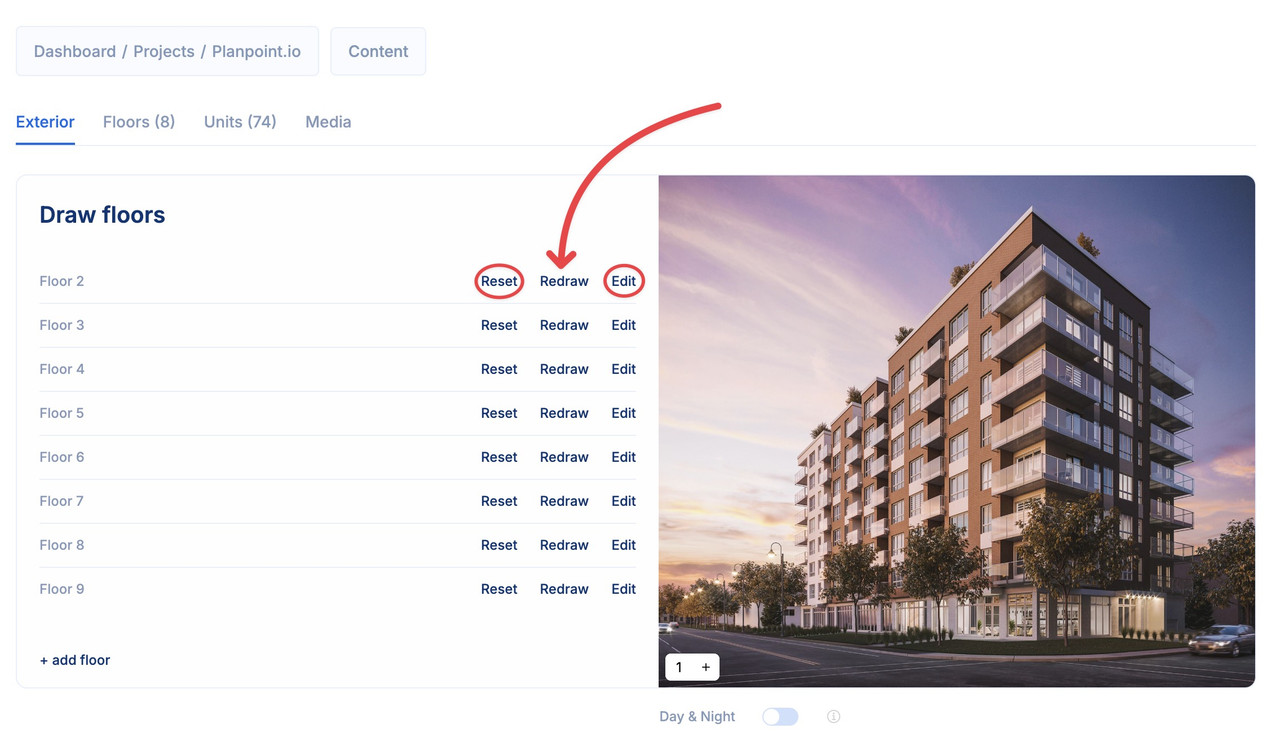
To draw the first floor, click on draw or redraw (depending on the case). The edit button allows you to change the floor name. And the reset button allows you to delete the drawn path and start again.
3
Step 3
After clicking on draw, a new window will pop up, allowing you to draw the exterior floor of the corresponding level.
Drawing in Planpoint is based on polygons. You can create polygons by simply clicking on the image where you want the node to appear. After you're done, click save path.
You can rework minor adjustments by clicking on Redraw and then using the magnetic snap feature, as you see below.
You can zoom in or zoom out the image using the + - buttons.
If you wish to completely redraw the floor, click on Reset.
You can also rename the floor how you want by clicking on Edit and editing the name field.
If Day & Night is turned on, you will be able to add an extra view of the project, but you will lose the ability to create a 360° project