How to customize the style
If you want deeper style customization capabilities, check out our Custom CSS article. You will need a developer for this.
How to embed
Planpoint can be embedded into any kind of website, from custom HTML/CSS/JS to platforms like Webflow, SquareSpace, Wix or WordPress. A Planpoint embed code is simply a few lines of HTML and JavaScript.
A Responsive Inline Channel will horizontally fill the width of its parent element and grow vertically based on the content of the channel.

Video Guide on how to embed
Step-by-step guide
1
Step 1
To access the Style & Embed module, locate the project you wish to access in your Planpoint dashboard and click on the Style & Embed button.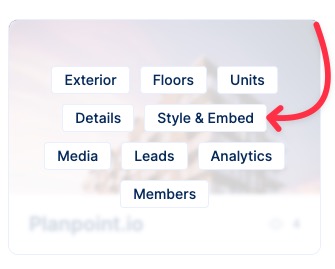
2
Step 2
To preview your work in progress, simply choose the desired language output, assign the namespace, project name, plan viewer theme and click on Open a new tab.
Assign a permanent namespace and project name before embedding the code. If these are modified, the code will cease to function, necessitating the need for re-embedding.
3
Step 3
A new window will open up with the live preview of your current project. Test your plan viewer and make changes accordingly. You will need to reload the preview in order for changes to take effect.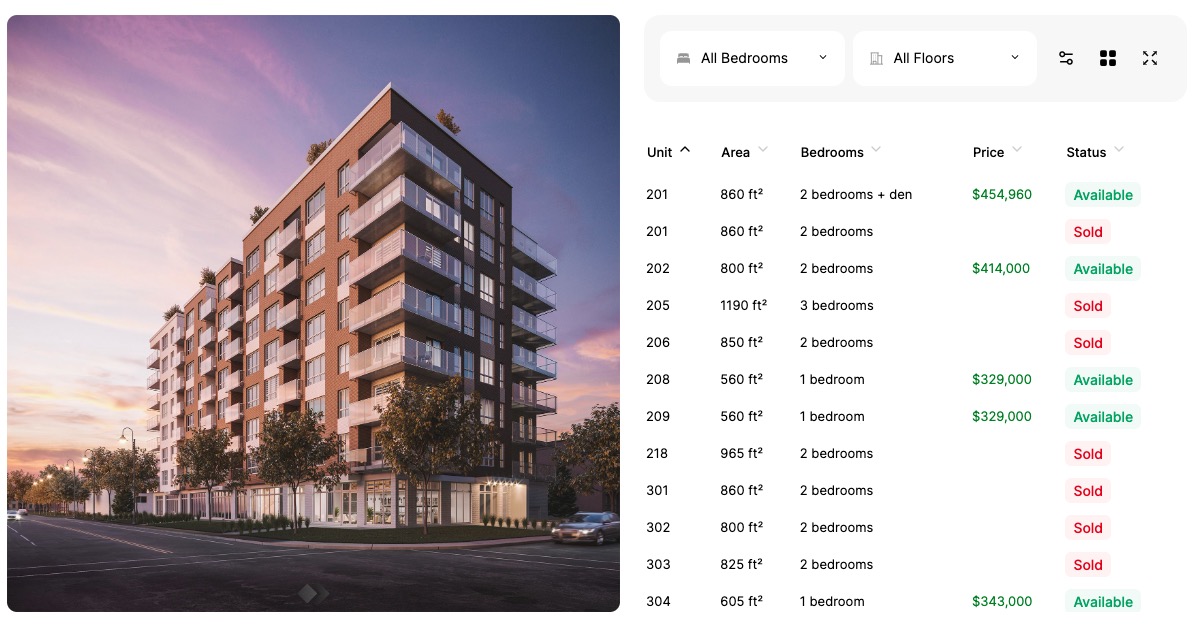
4
Step 4
Once you’re satisfied with your plan viewer, simply select the desired language output and theme, and click on Click to copy.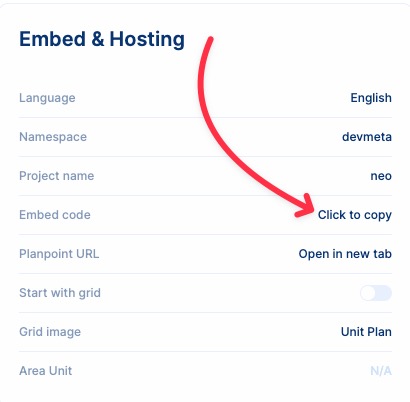
- You can export as many instances of your plan viewer as you wish, in 5 languages (English, French, Spanish, Chinese and German). Each language will have it’s own script to copy-paste.
- You should paste the code wherever you want your plan viewer to appear in your website. The plan viewer will fill the parent element in which it’s inserted. The code will work on every major website platform, from Wordpress to Wix and custom HTML.