- Lead capture
- Unit inquiries
- Reservation requests
- Contact and information collection
Video Guide for Visual Learners
Enabling the Form
To activate a form for your viewer:- In your dashboard, go to Sales & Marketing. From there, you will find the Form module.
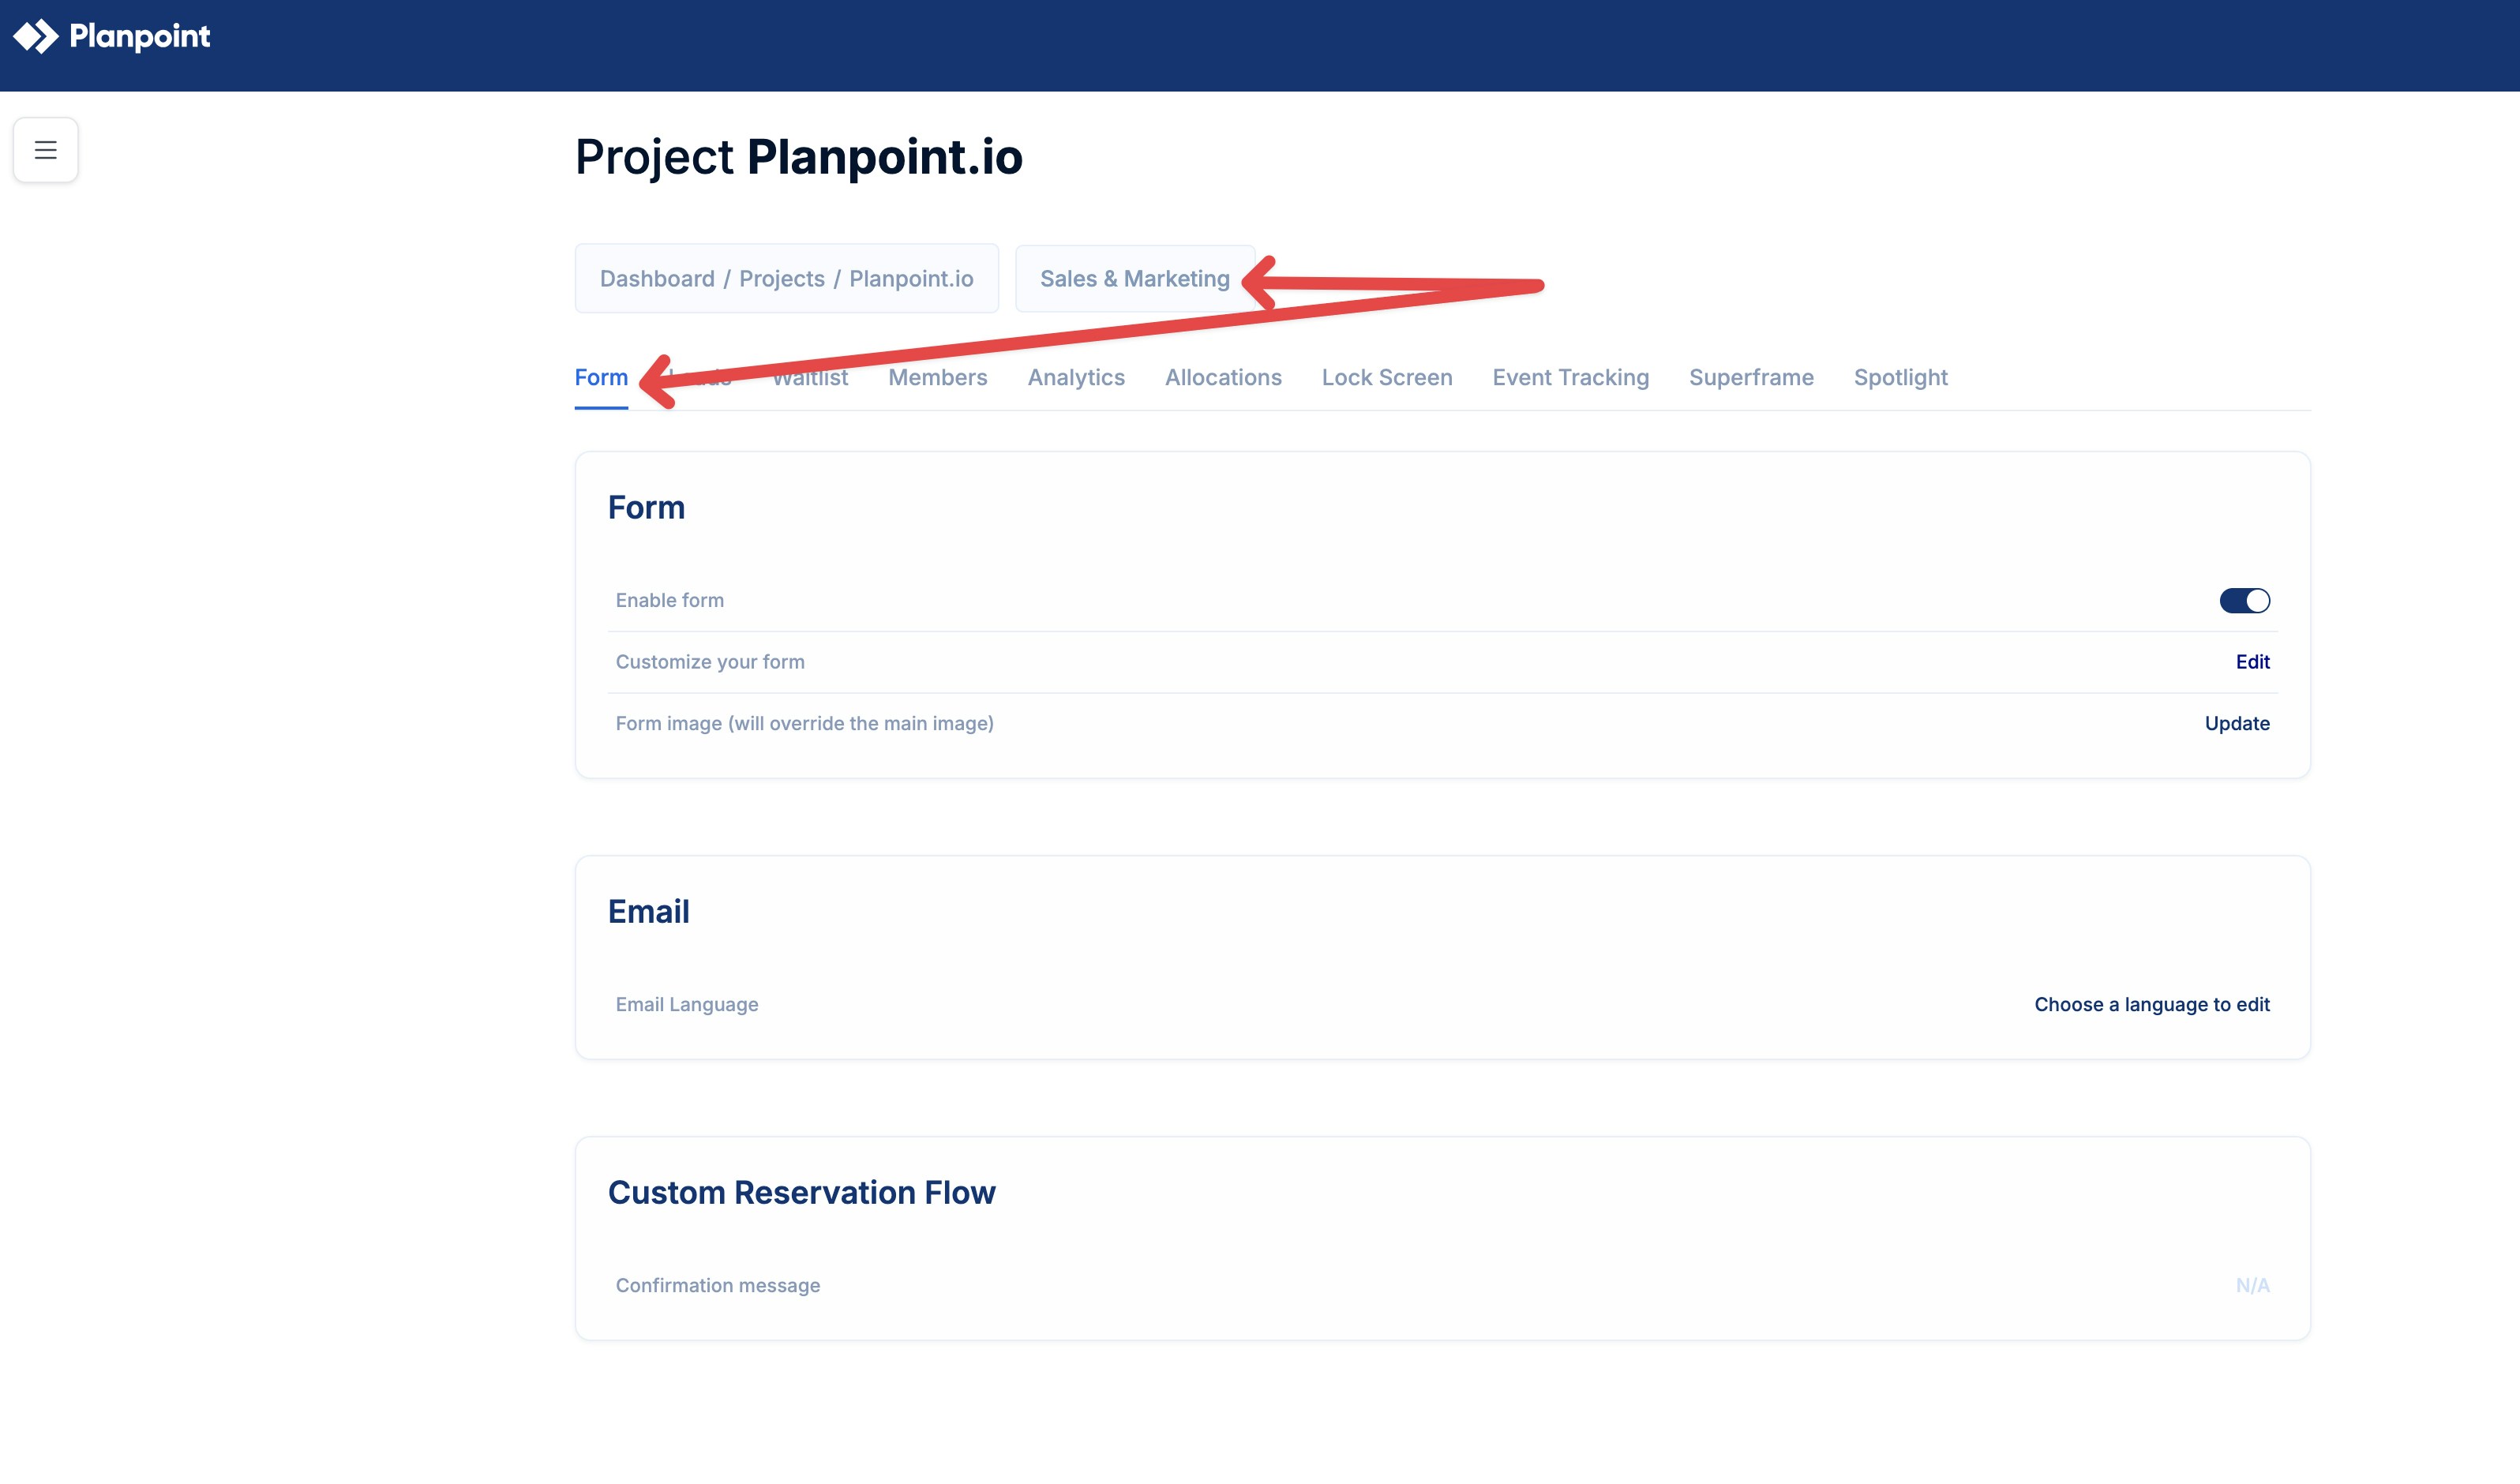
- Toggle Enable form to ON.
Form Configuration
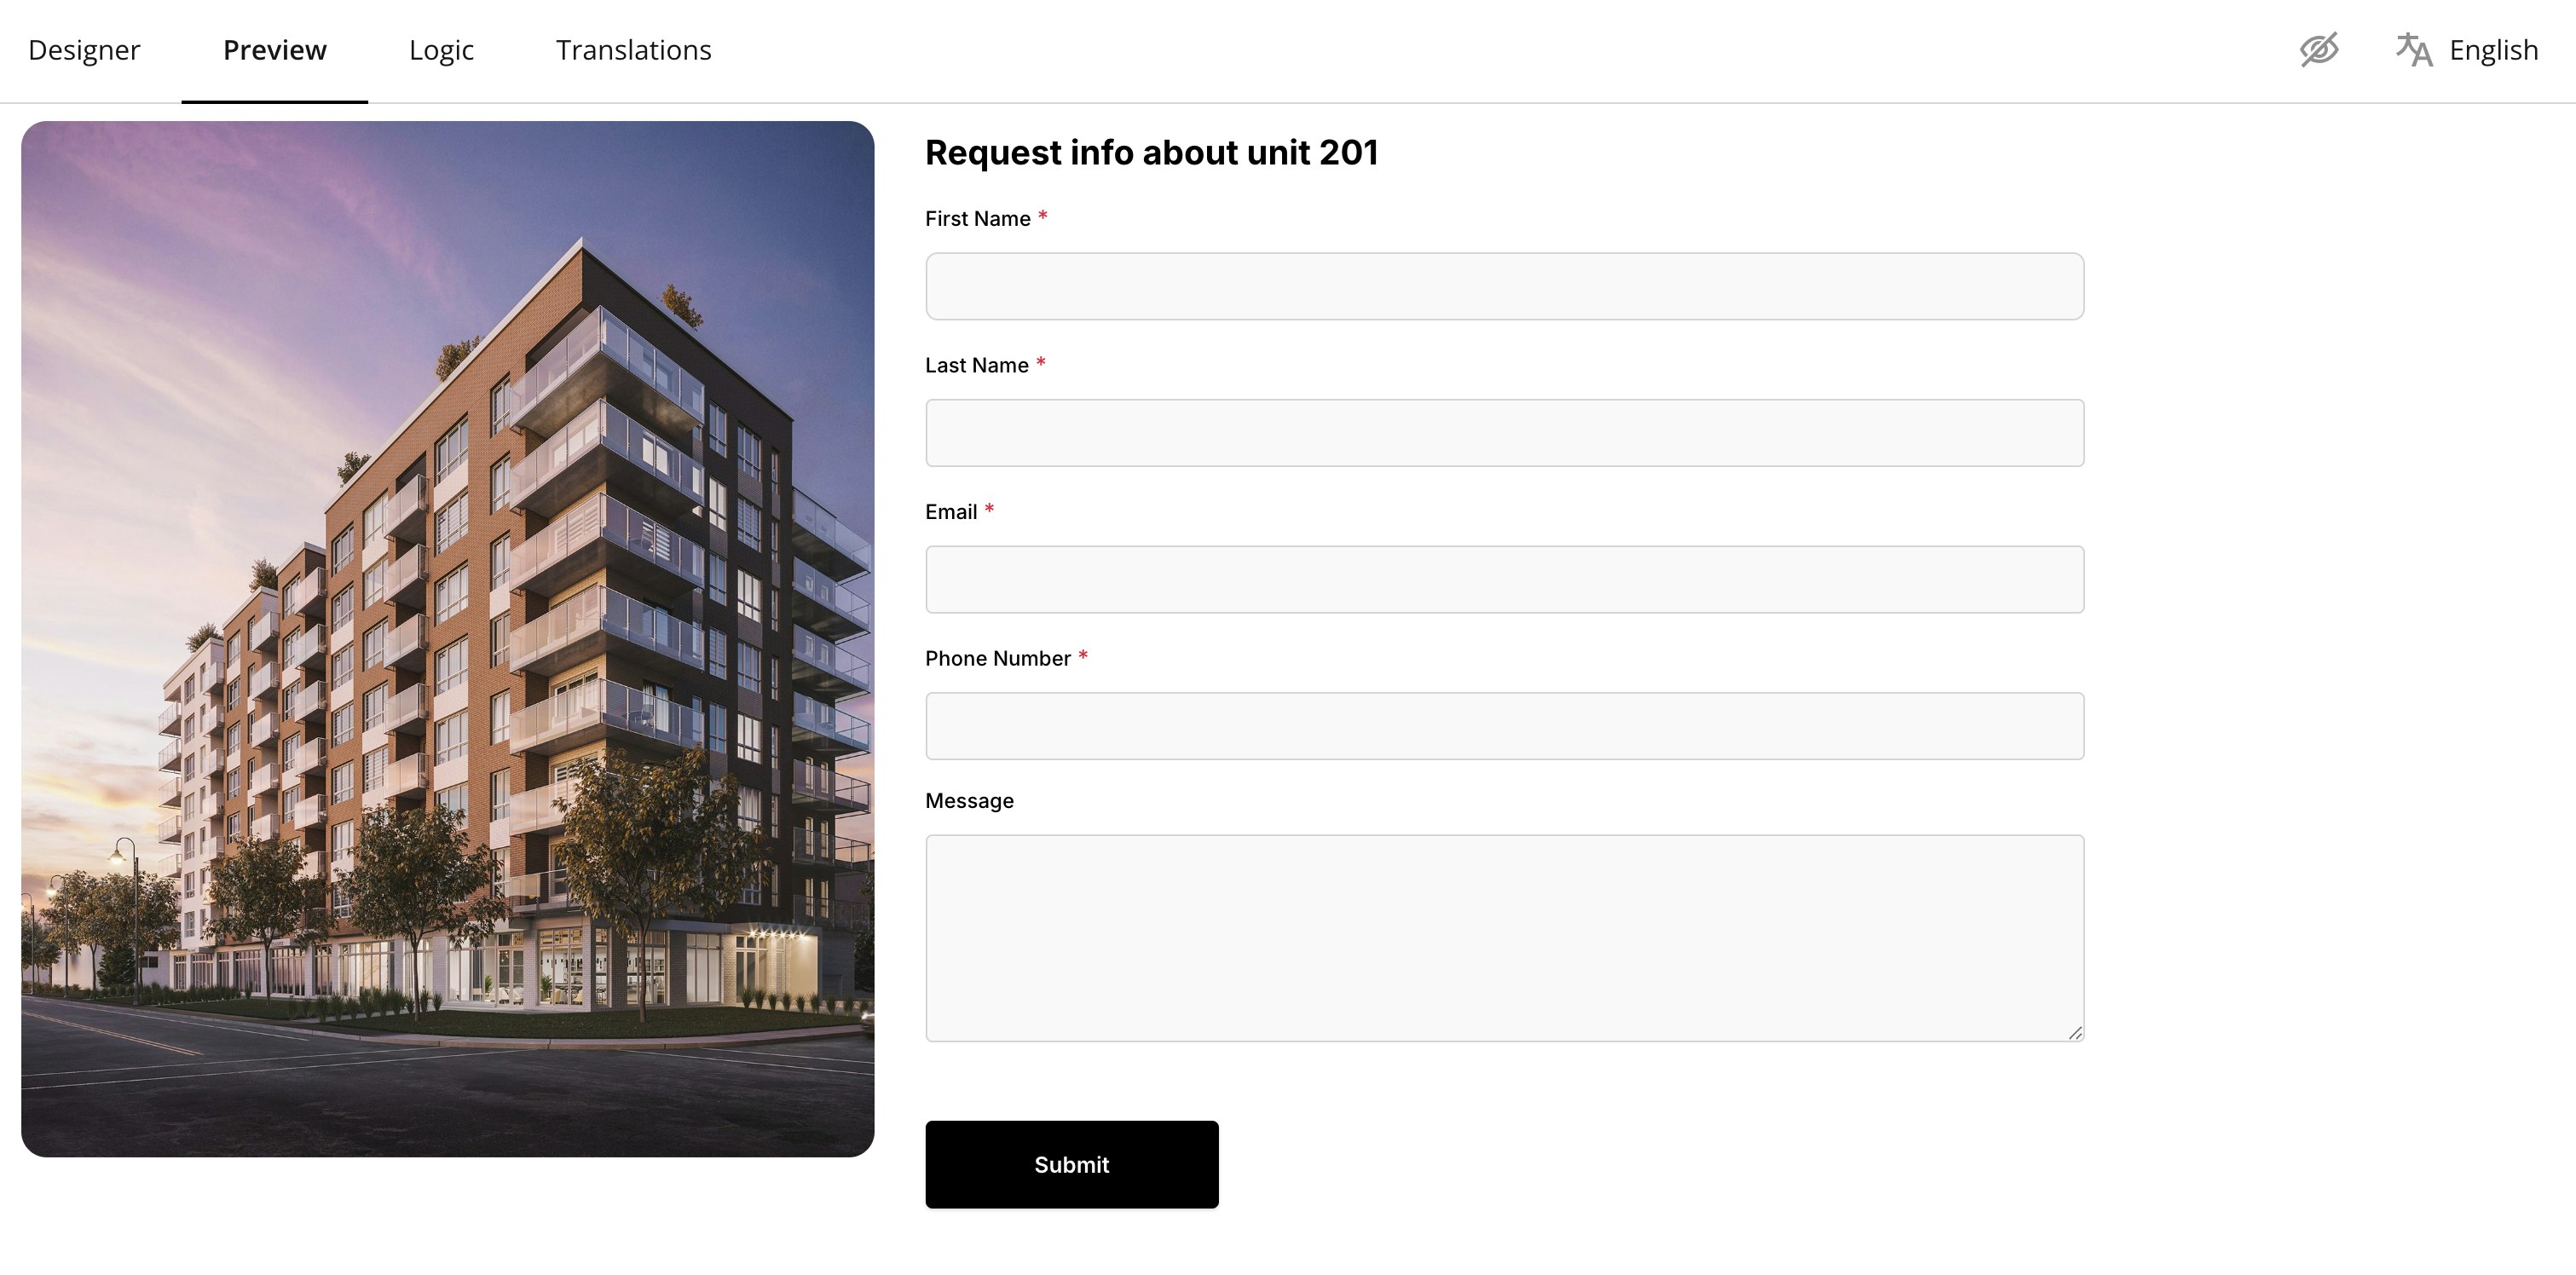
To customize your form, click Edit to open the Form builder. The builder is divided into four main sections:- Designer
- Preview
- Logic
- Translations
Designer
The Designer tab is where you build and configure the structure of your form.Form Title and Description
- Form title: Defines the main heading of the form. Example: Request info about unit unitName Dynamic variables like unitName are supported.
- Title visibility: You can choose whether the title and description are visible to end users.
Form Language
- Select the default language for the form. Available default languages are English, Spanish, French, and German.
Display Settings
- Form display mode
- Editable: Users can fill in and submit the form.
- Read-only: Form is visible but cannot be edited.
- Form width mode
- Auto: Adjust automatically to layout.
- Static: Fixed width.
- Responsive: Adapts to different screen sizes.
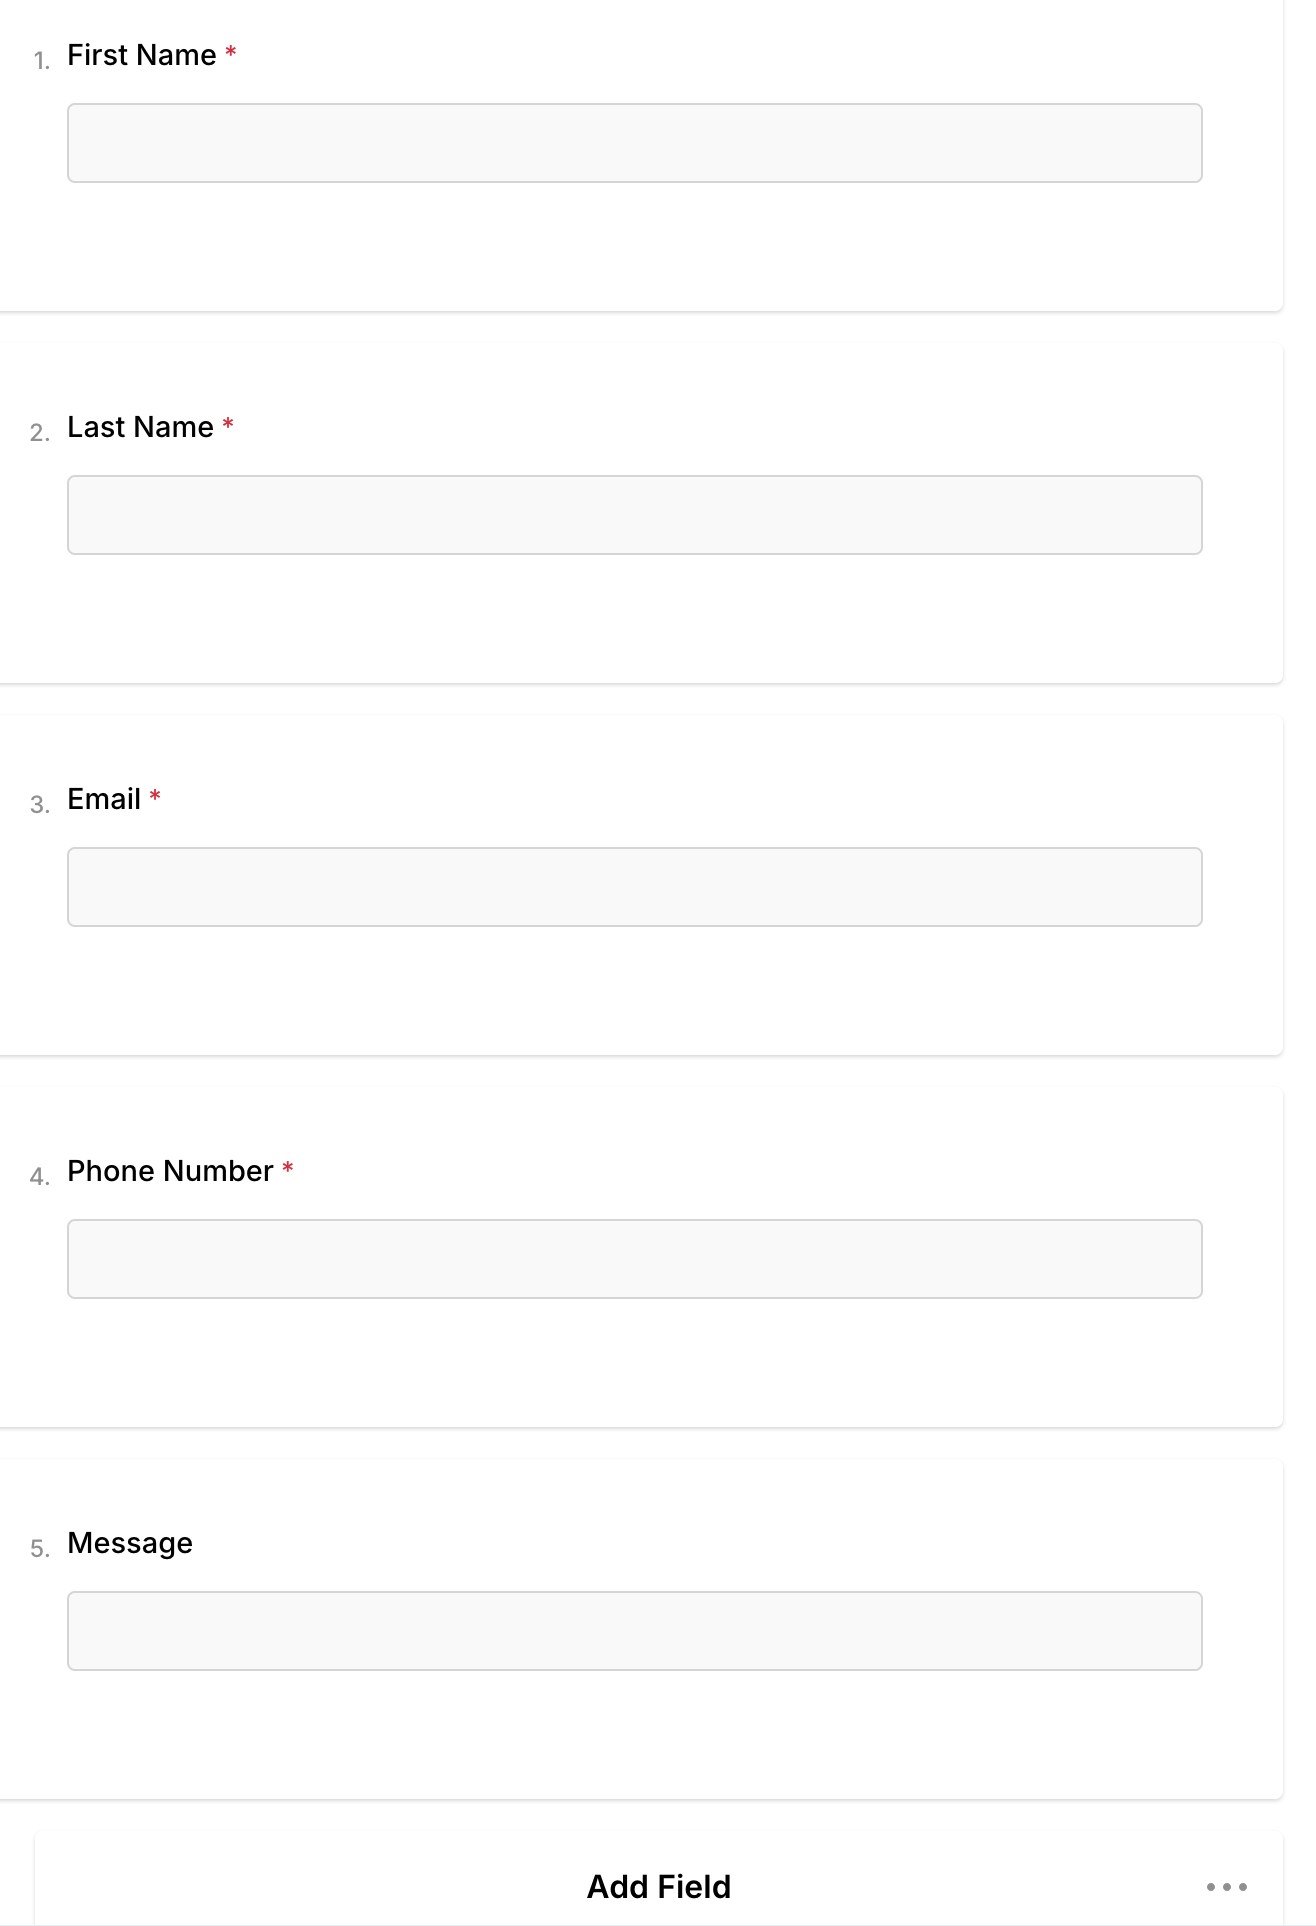
Fields and Questions
You can add and configure multiple field types, including:- Single-line input
- Long text
- Radio button groups
- Checkboxes
- Dropdowns
- Multi-select dropdowns
- Yes / No questions
- Required / optional settings
- Custom labels
- Validation rules
Logo and Header
You can upload a logo to display in the form header, helping mantain brand consistency.Navigation and Pages
- Organize the form into multiple pages
- Control navigation between pages
- Define the overall flow of the form
Validation
Set validation rules to ensure users provide correct and complete information (e.g. required fields, email format).Thank you page
After submission, users are shown a confirmation screen. You can customize:- Thank you message
- HTML markup
- Button text
Preview
The Preview tab allows you to see exactly how the form will appear to end users before publishing.- View the full layout
- Test field behaviour
- Confirm images, text, and button placement
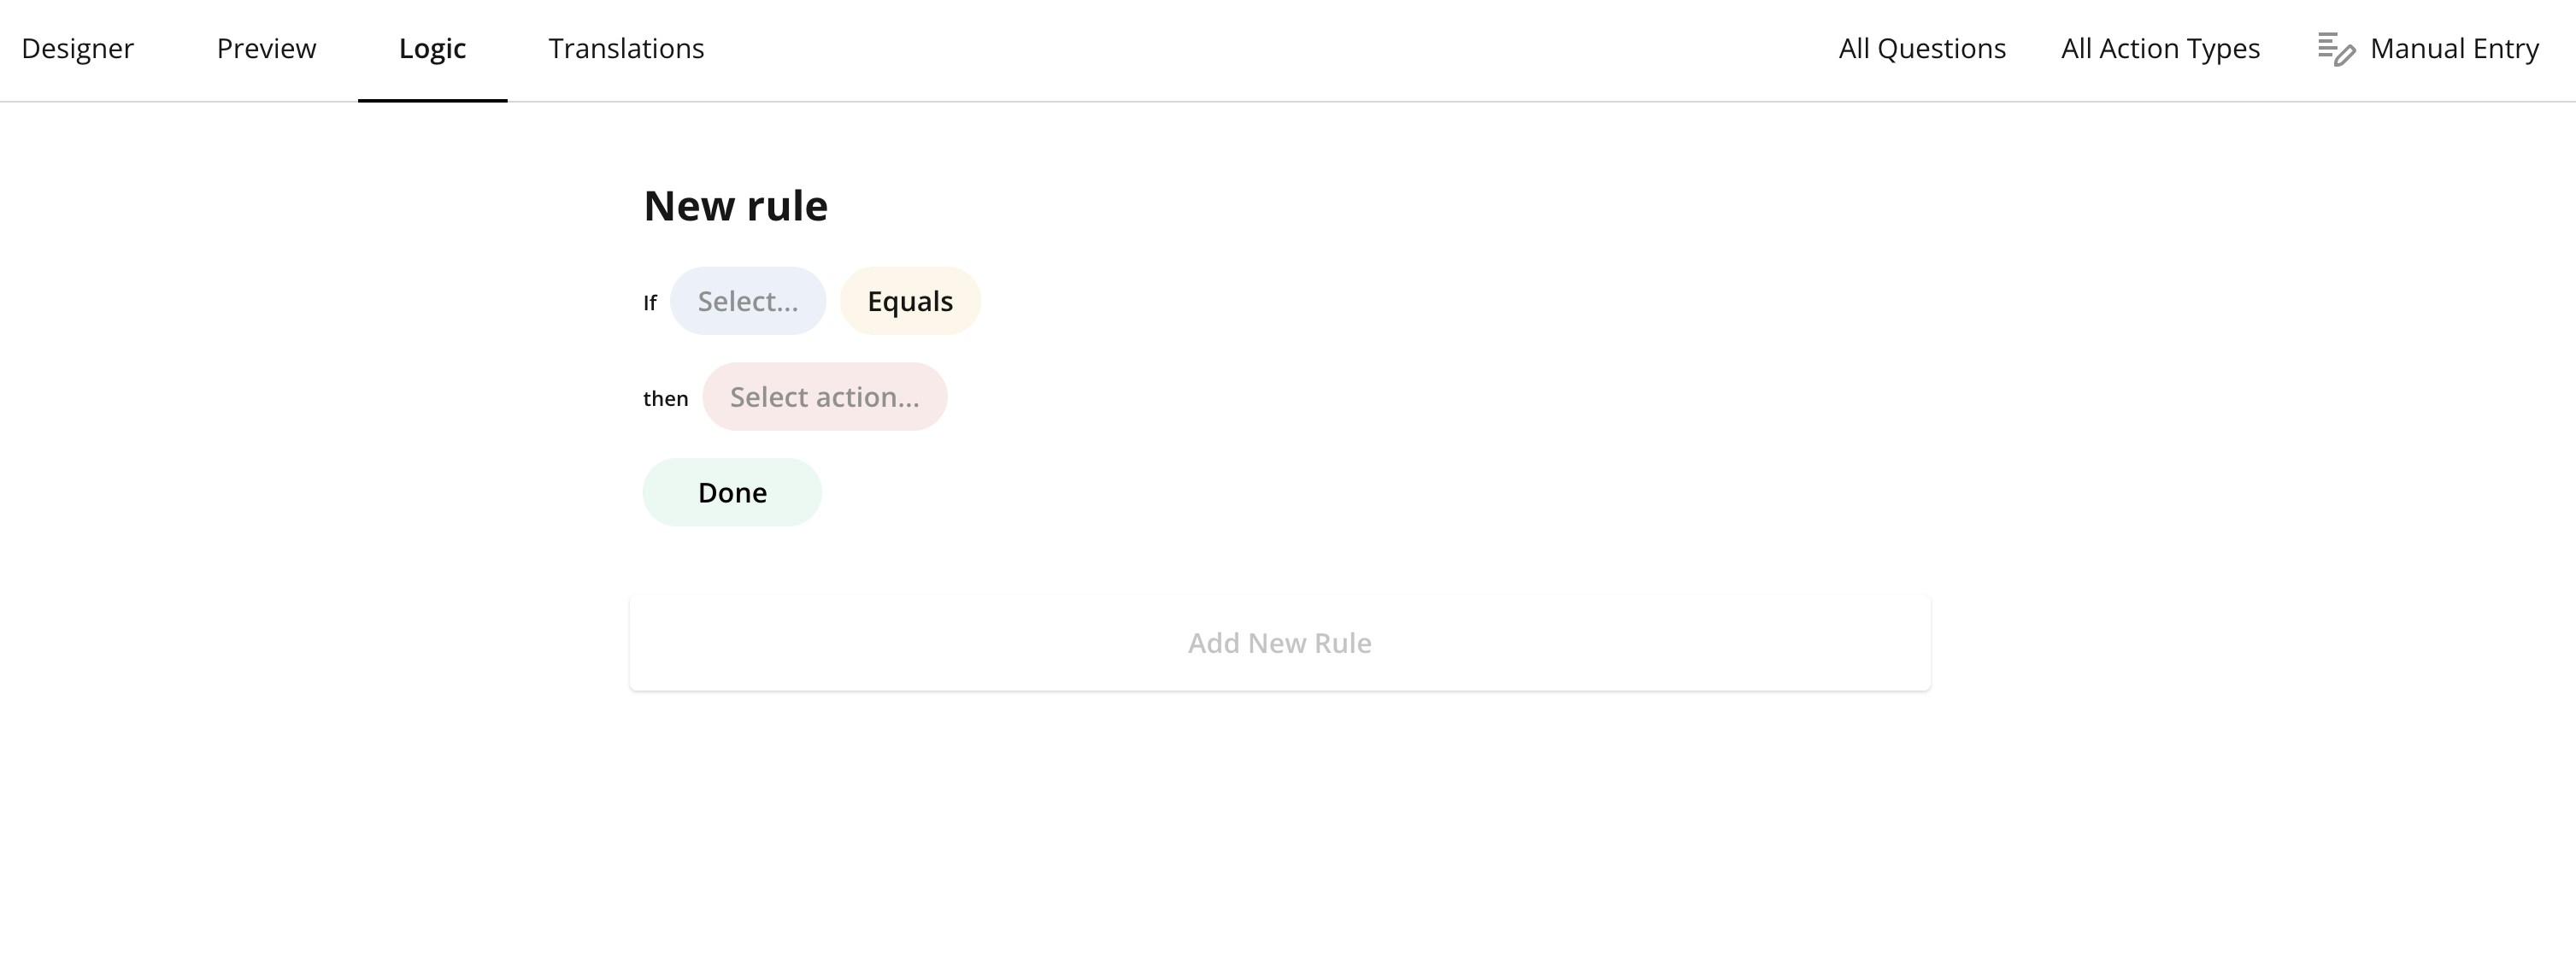
Logic
The logic tab lets you define conditional rules that control the form flow.Logic Rules
You can create rules based on user input to:- Show or hide specific questions
- Control navigation between pages
- Customize the user journey dynamically
- Go to Logic
- Click Add New Rule
- Define the condition and resulting action
Translations
The Translations tab aloows you to manage multi-language versions of the form.Supported Translations
You can translate:- Form title
- Button text
- Than you page content
- Questions labels
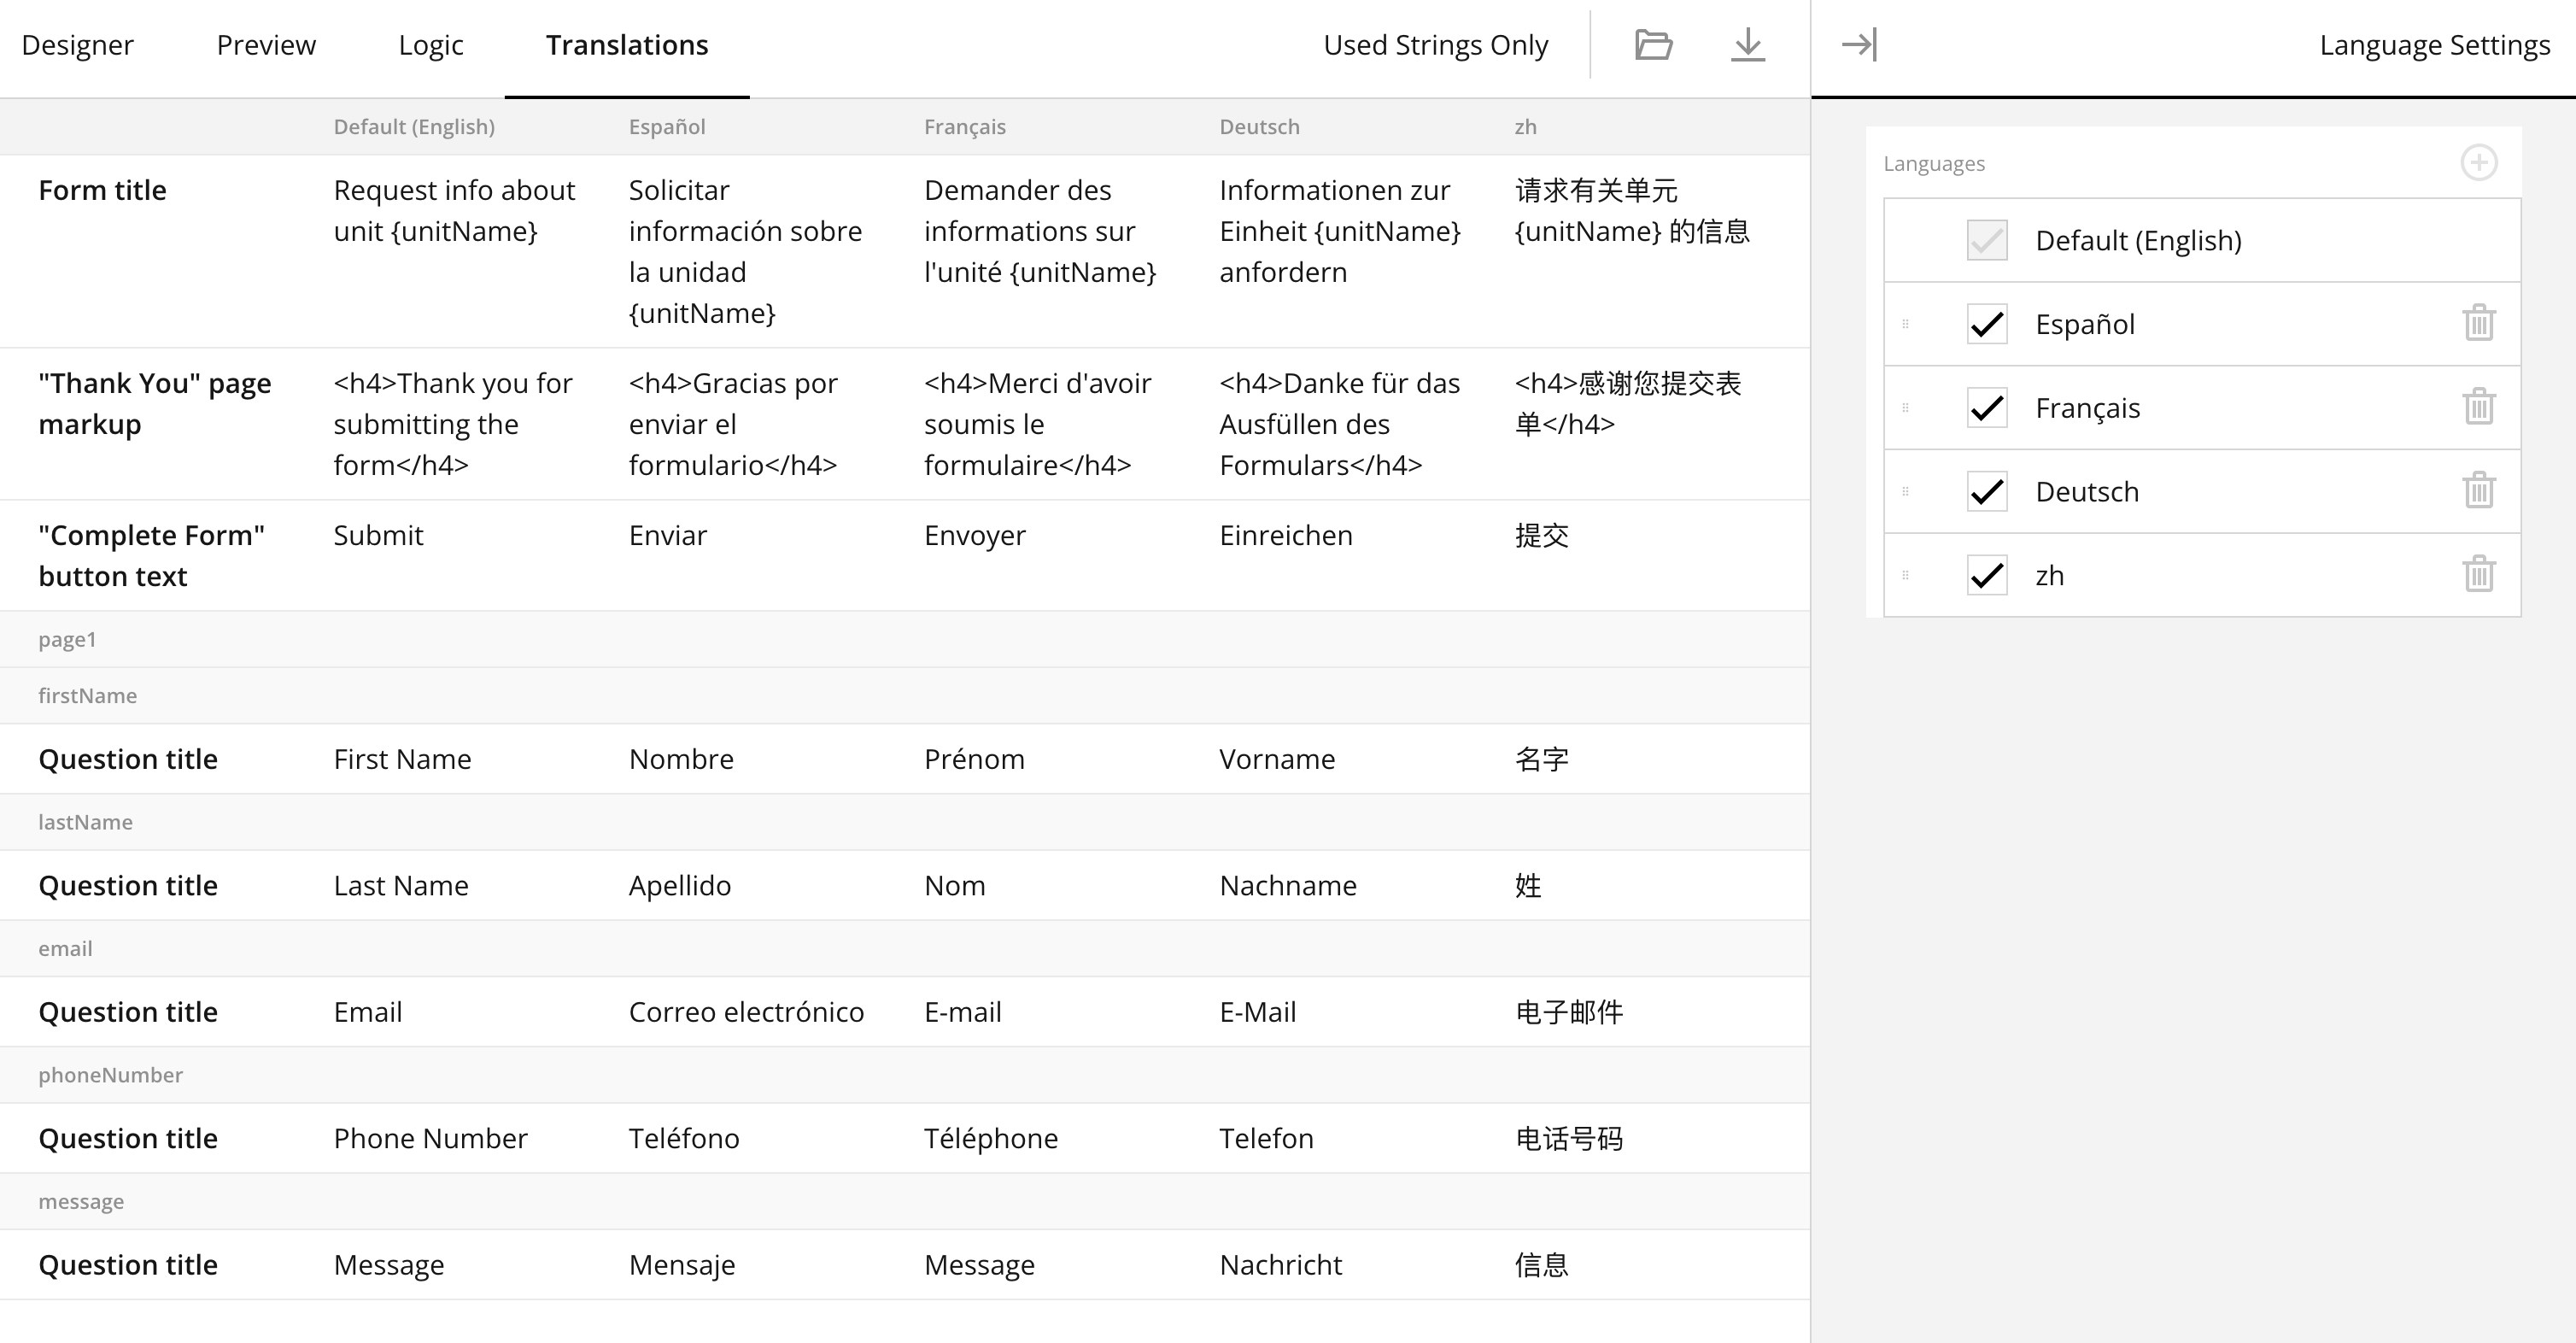
Language Management
- Add or remove languages
- Enable only selected languages
- Keep English as default fallback