The Terminology feature allows you to customize the wording used throughout your project so it aligns with your business, market, or customer preferences. By adjusting key terms, you can ensure the interface language matches how your customers naturally refer to units, listings, and project details.
This is especially useful for adapting Planpoint to different industries, regions, or branding requirements without changing any underlying functionality.
Terminology updates are applied across the project wherever those terms appear, creating a more consistent and familiar experience for your users.
How to Access Terminology Settings
- Open your project and go to Settings.
- Navigate to Style & Embed.
- Click Customize Style.
- Within the Style editor, open the Terminology tab.
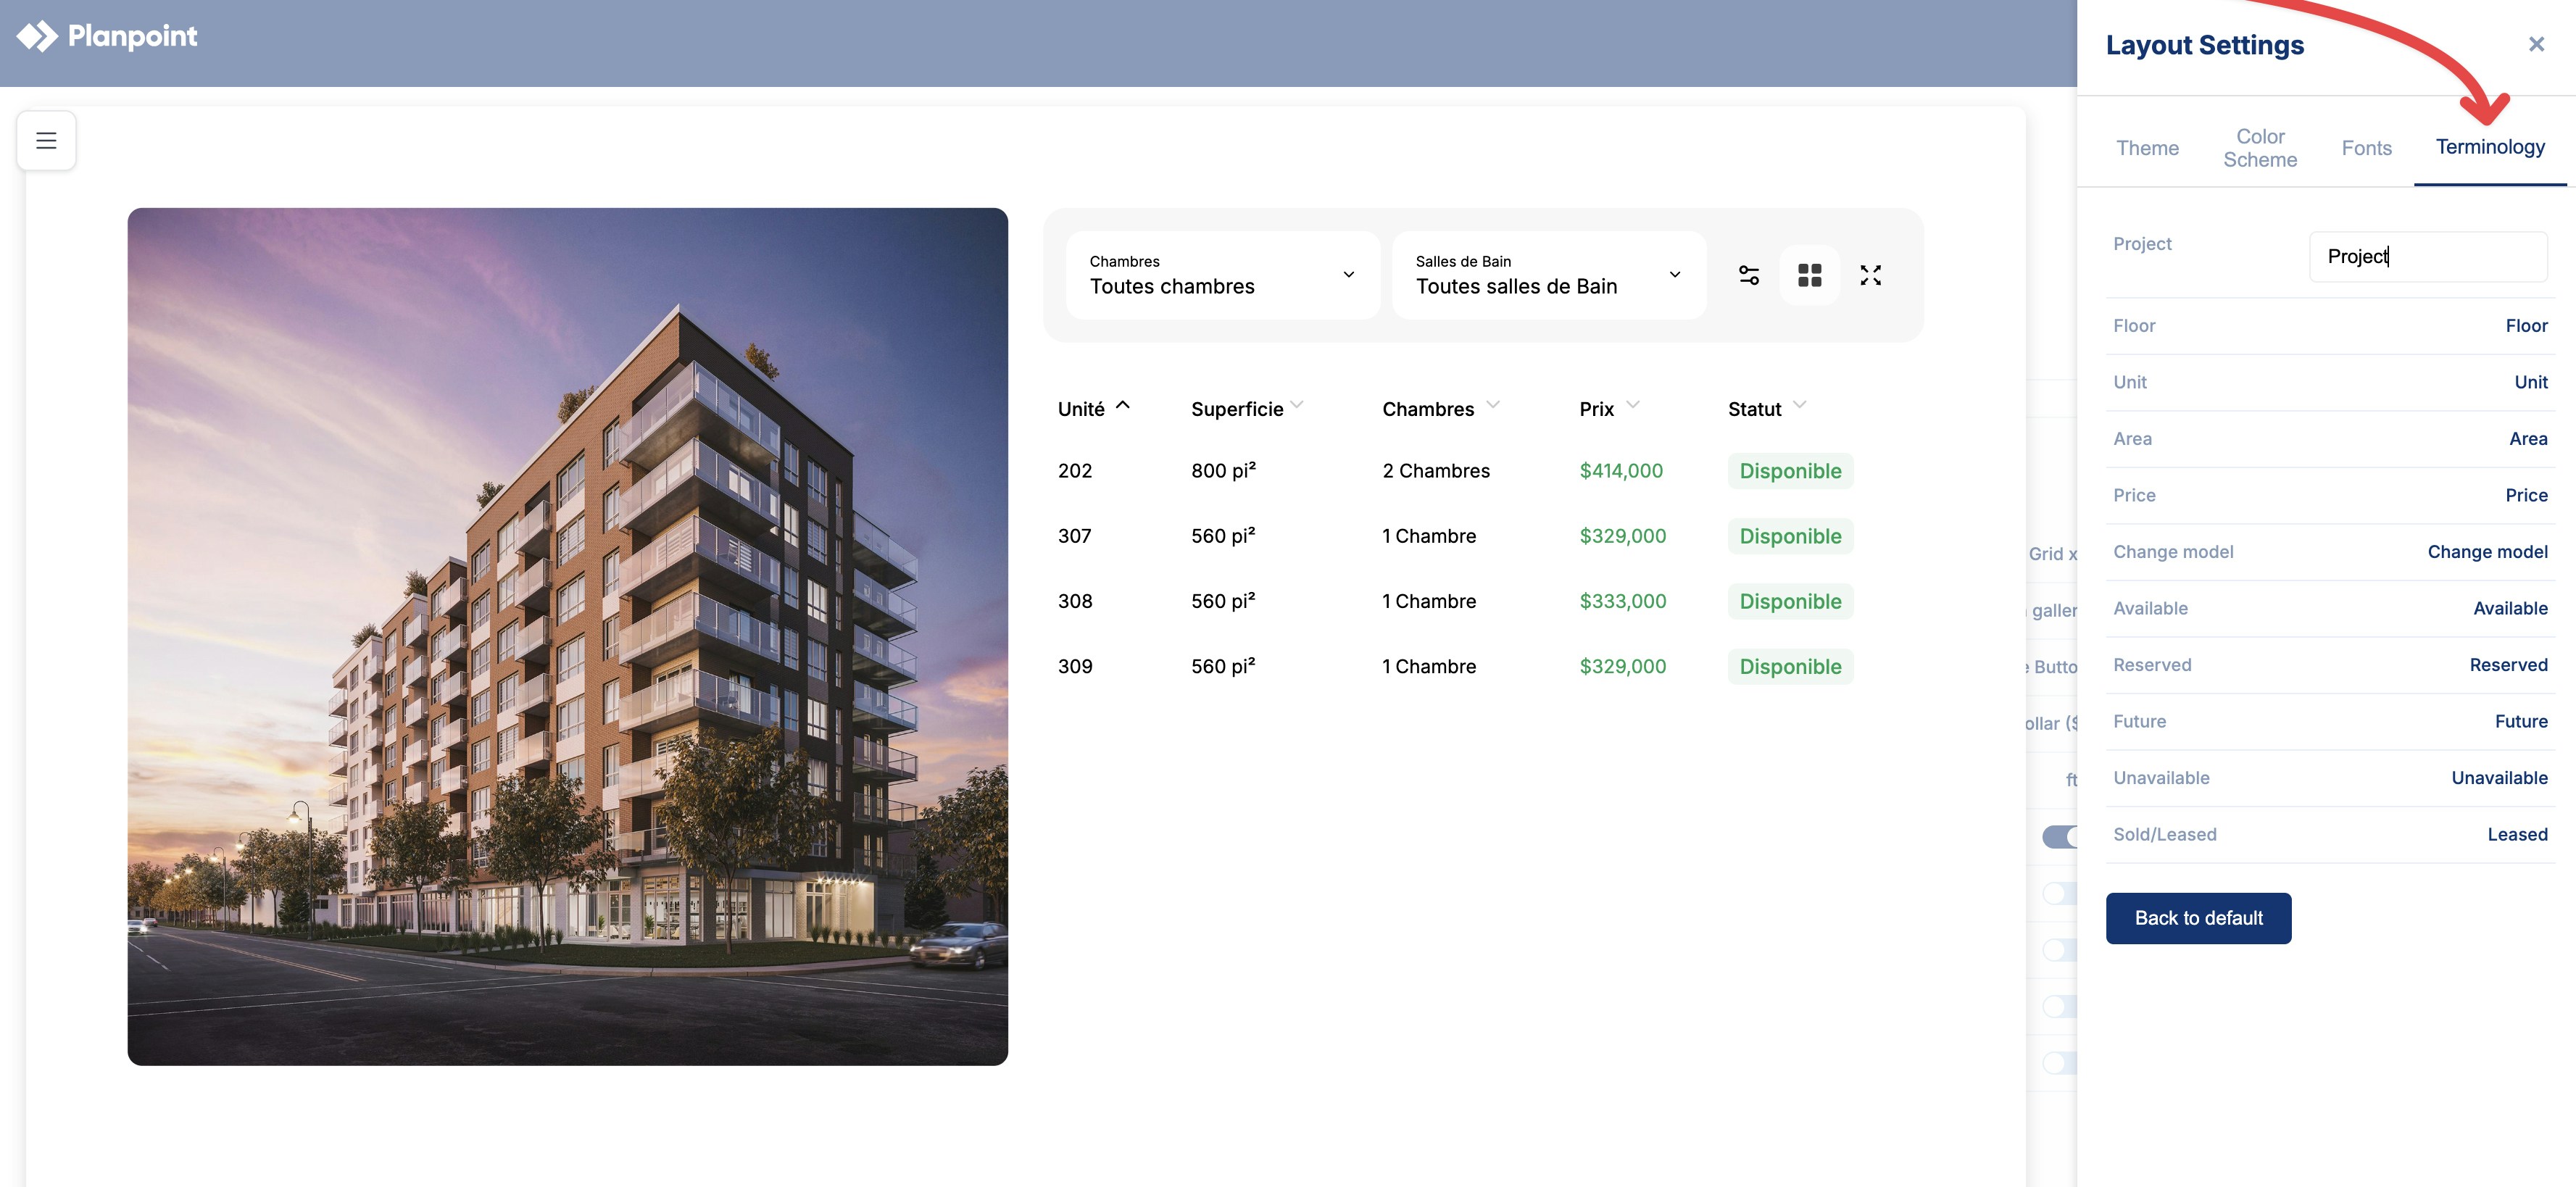
From there, simply click on the term you want to edit and enter the wording of your choice. Changes are applied automatically and reflected everywhere that term appears in the project.
Editable Terminology
The following terms can be customized on a per-project basis. Updating a term will change how it appears throughout the project interface.