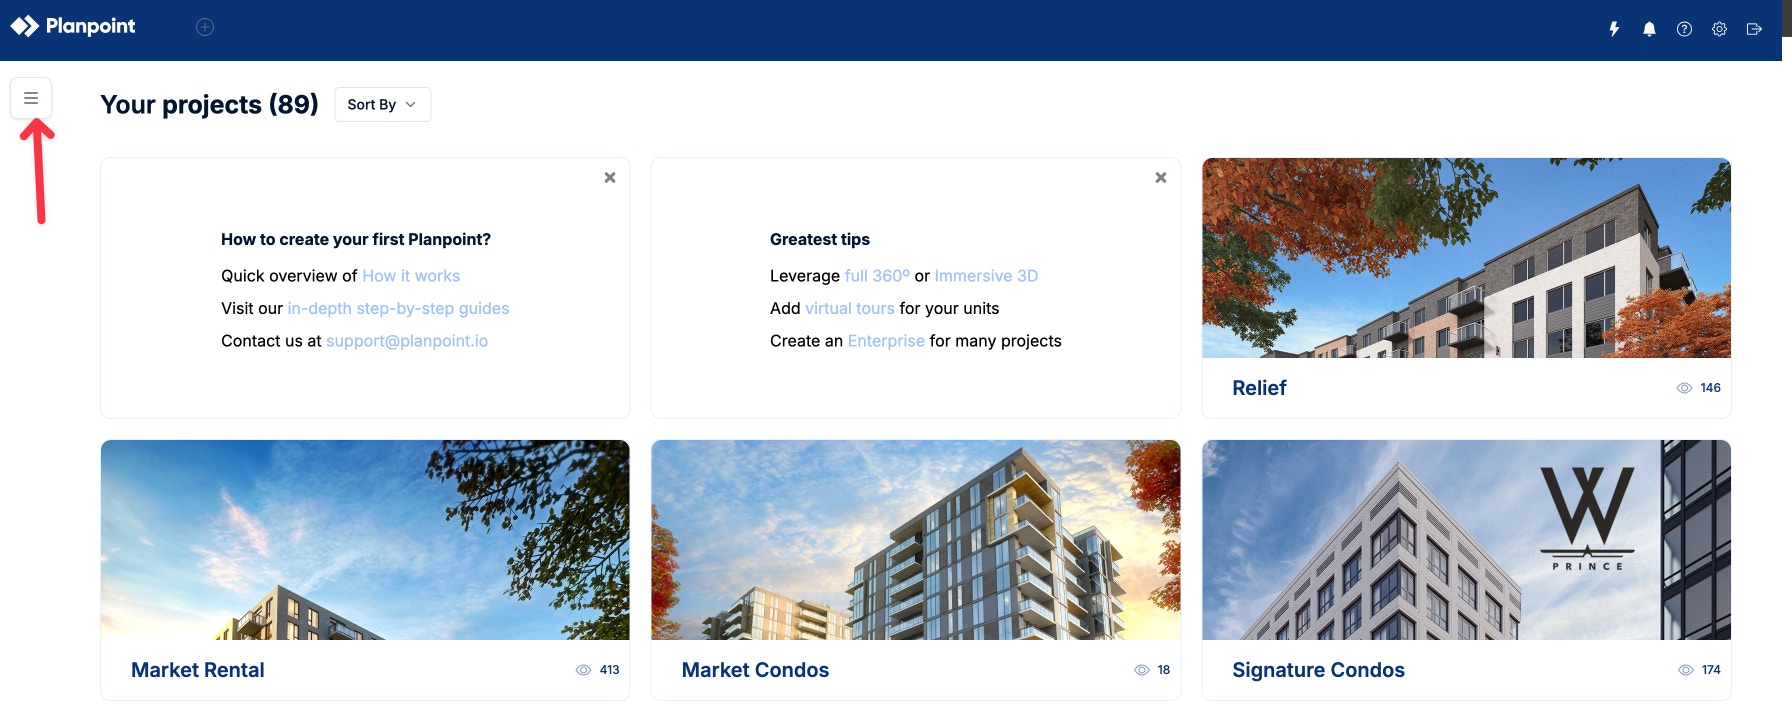
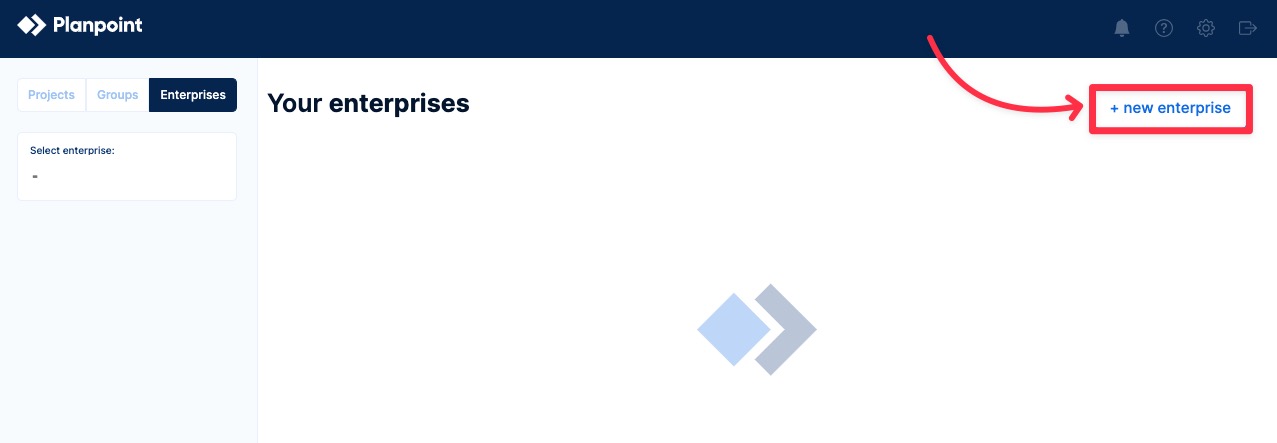
In your Planpoint dashboard, click the hamburger menu icon and then select Enterprises.
2
Step 2: Create your Enterprise project
To create you enterprise project, click on new enterprise. Assign a name for the enterprise and click on save and create.
3
Step 3: Enterprise dashboard
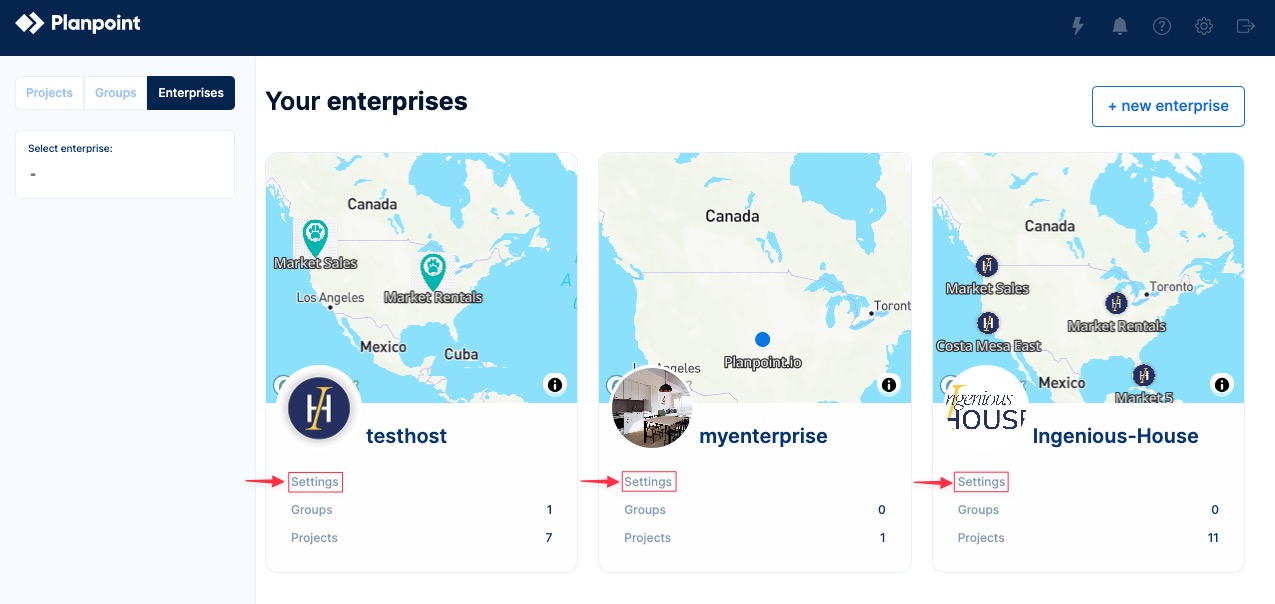
Once you create your project or projects, you can observe them displayed in your enterprise dashboard. Then click on Settings to begin editing your enterprise project.
4
Step 4: Edit your new Enterprise project
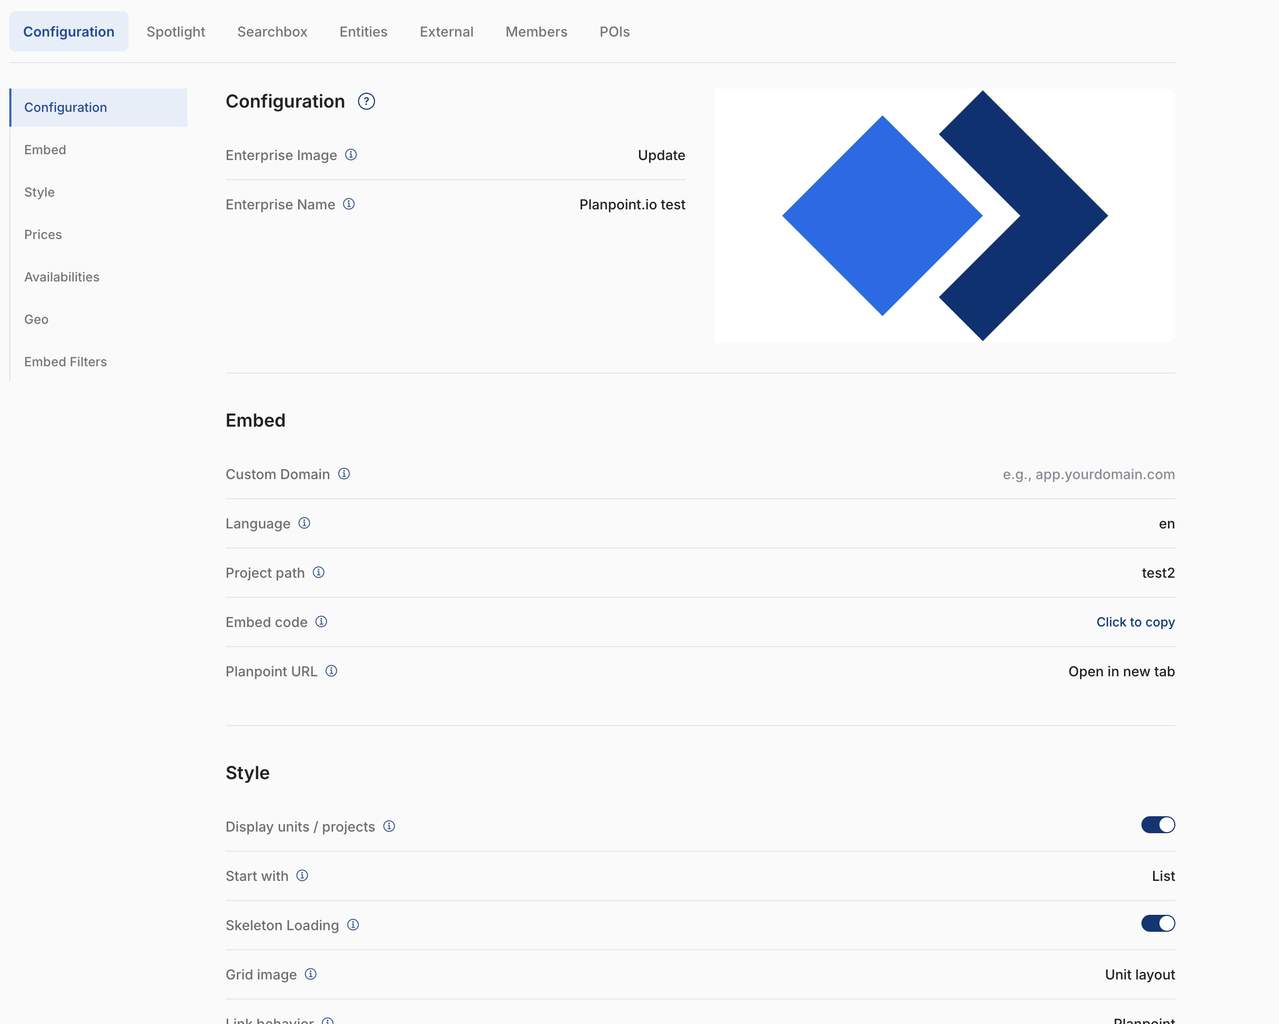
Here, you can customize your enterprise project. You will be able to add your Enterprise image, edit the project’s name, assign the embed options and prices, set the availabilities, layouts, and colors you want to use.
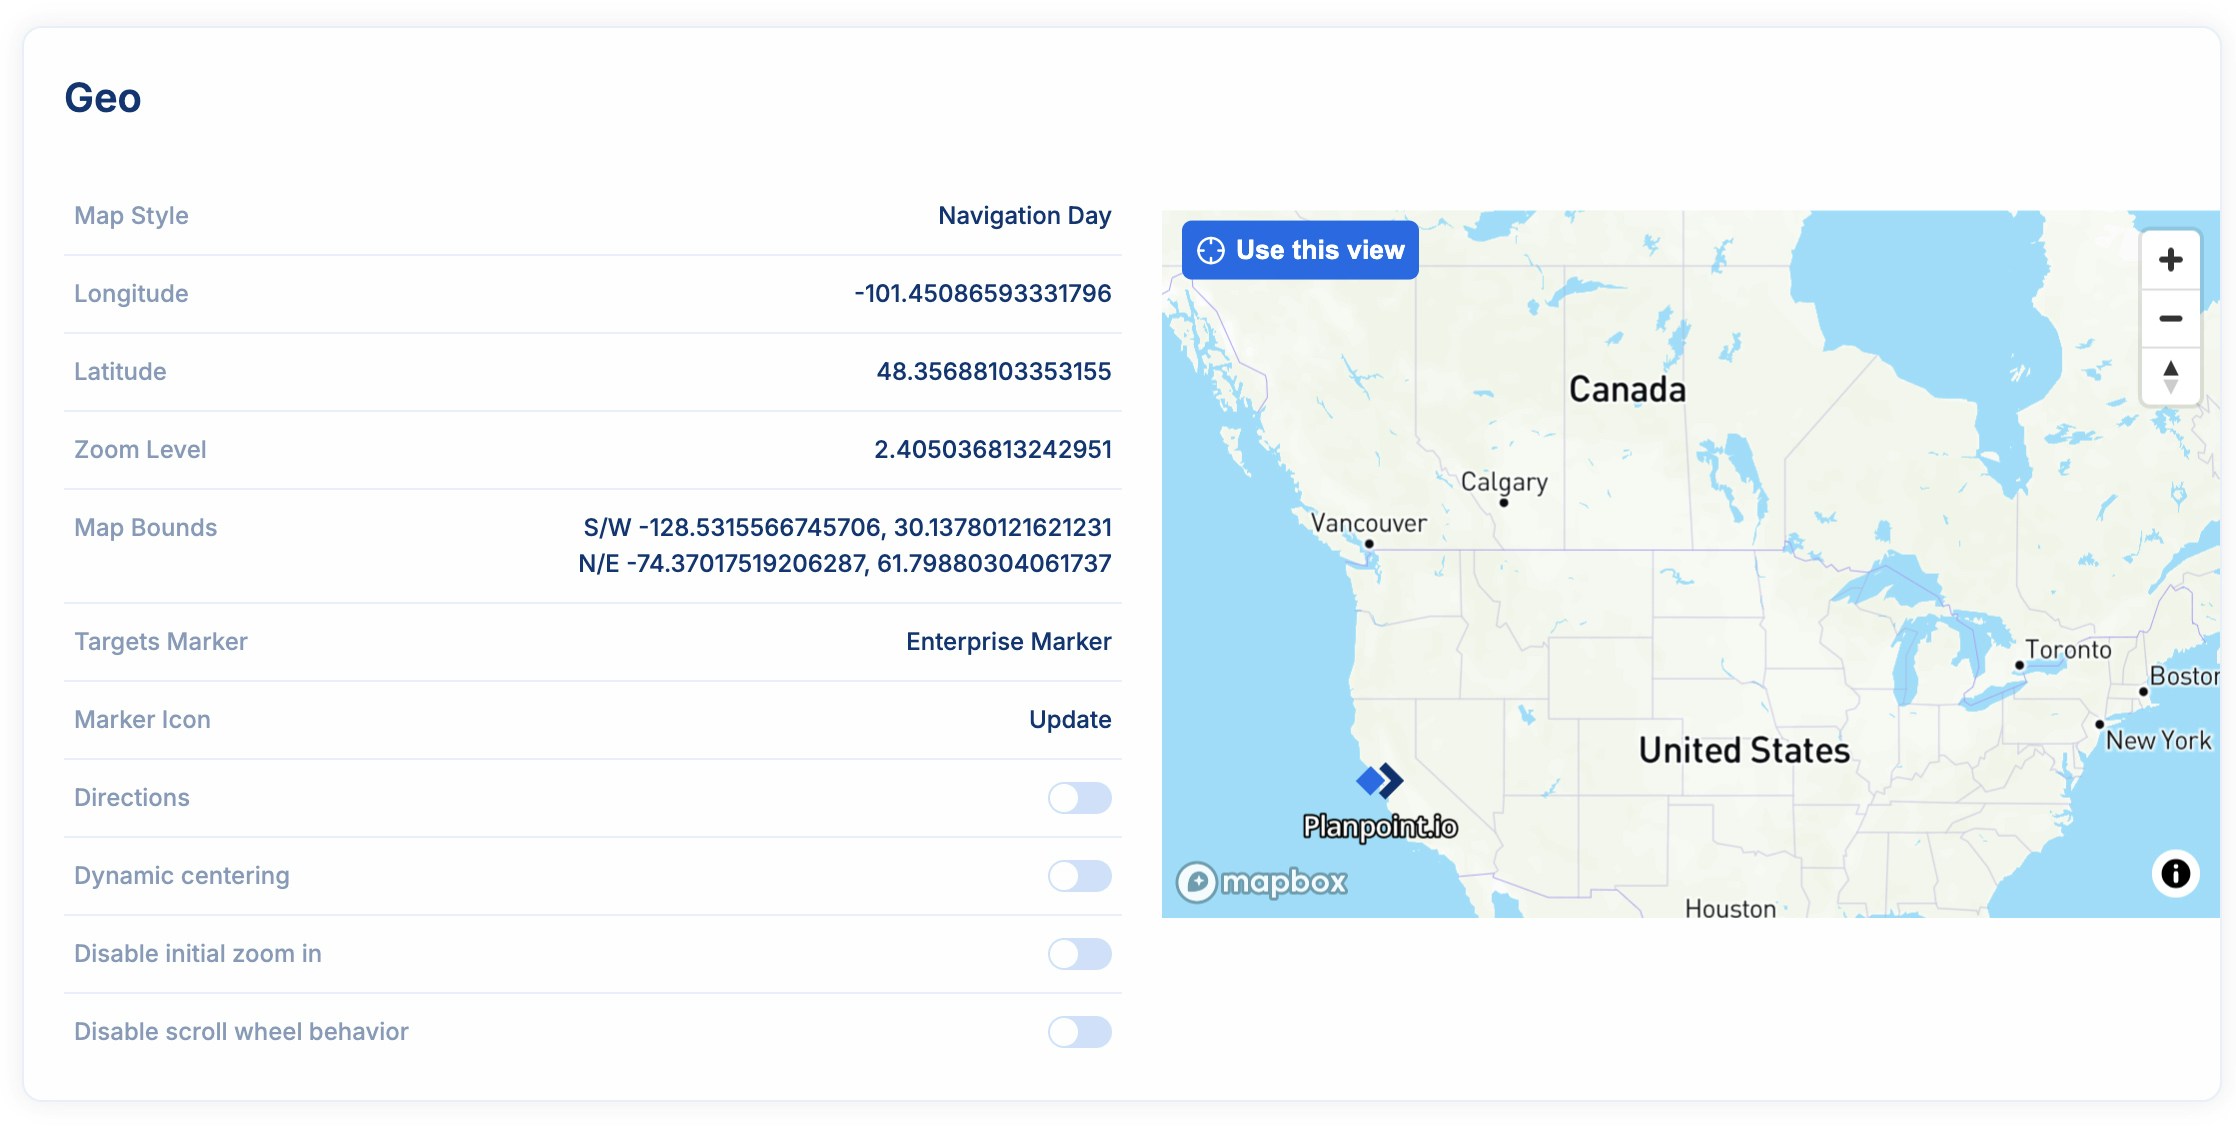
To finalize the project settings, you need to organize everything related to geolocation. Here you can select the map style, the target marker, the map point color and add directions if you wish.
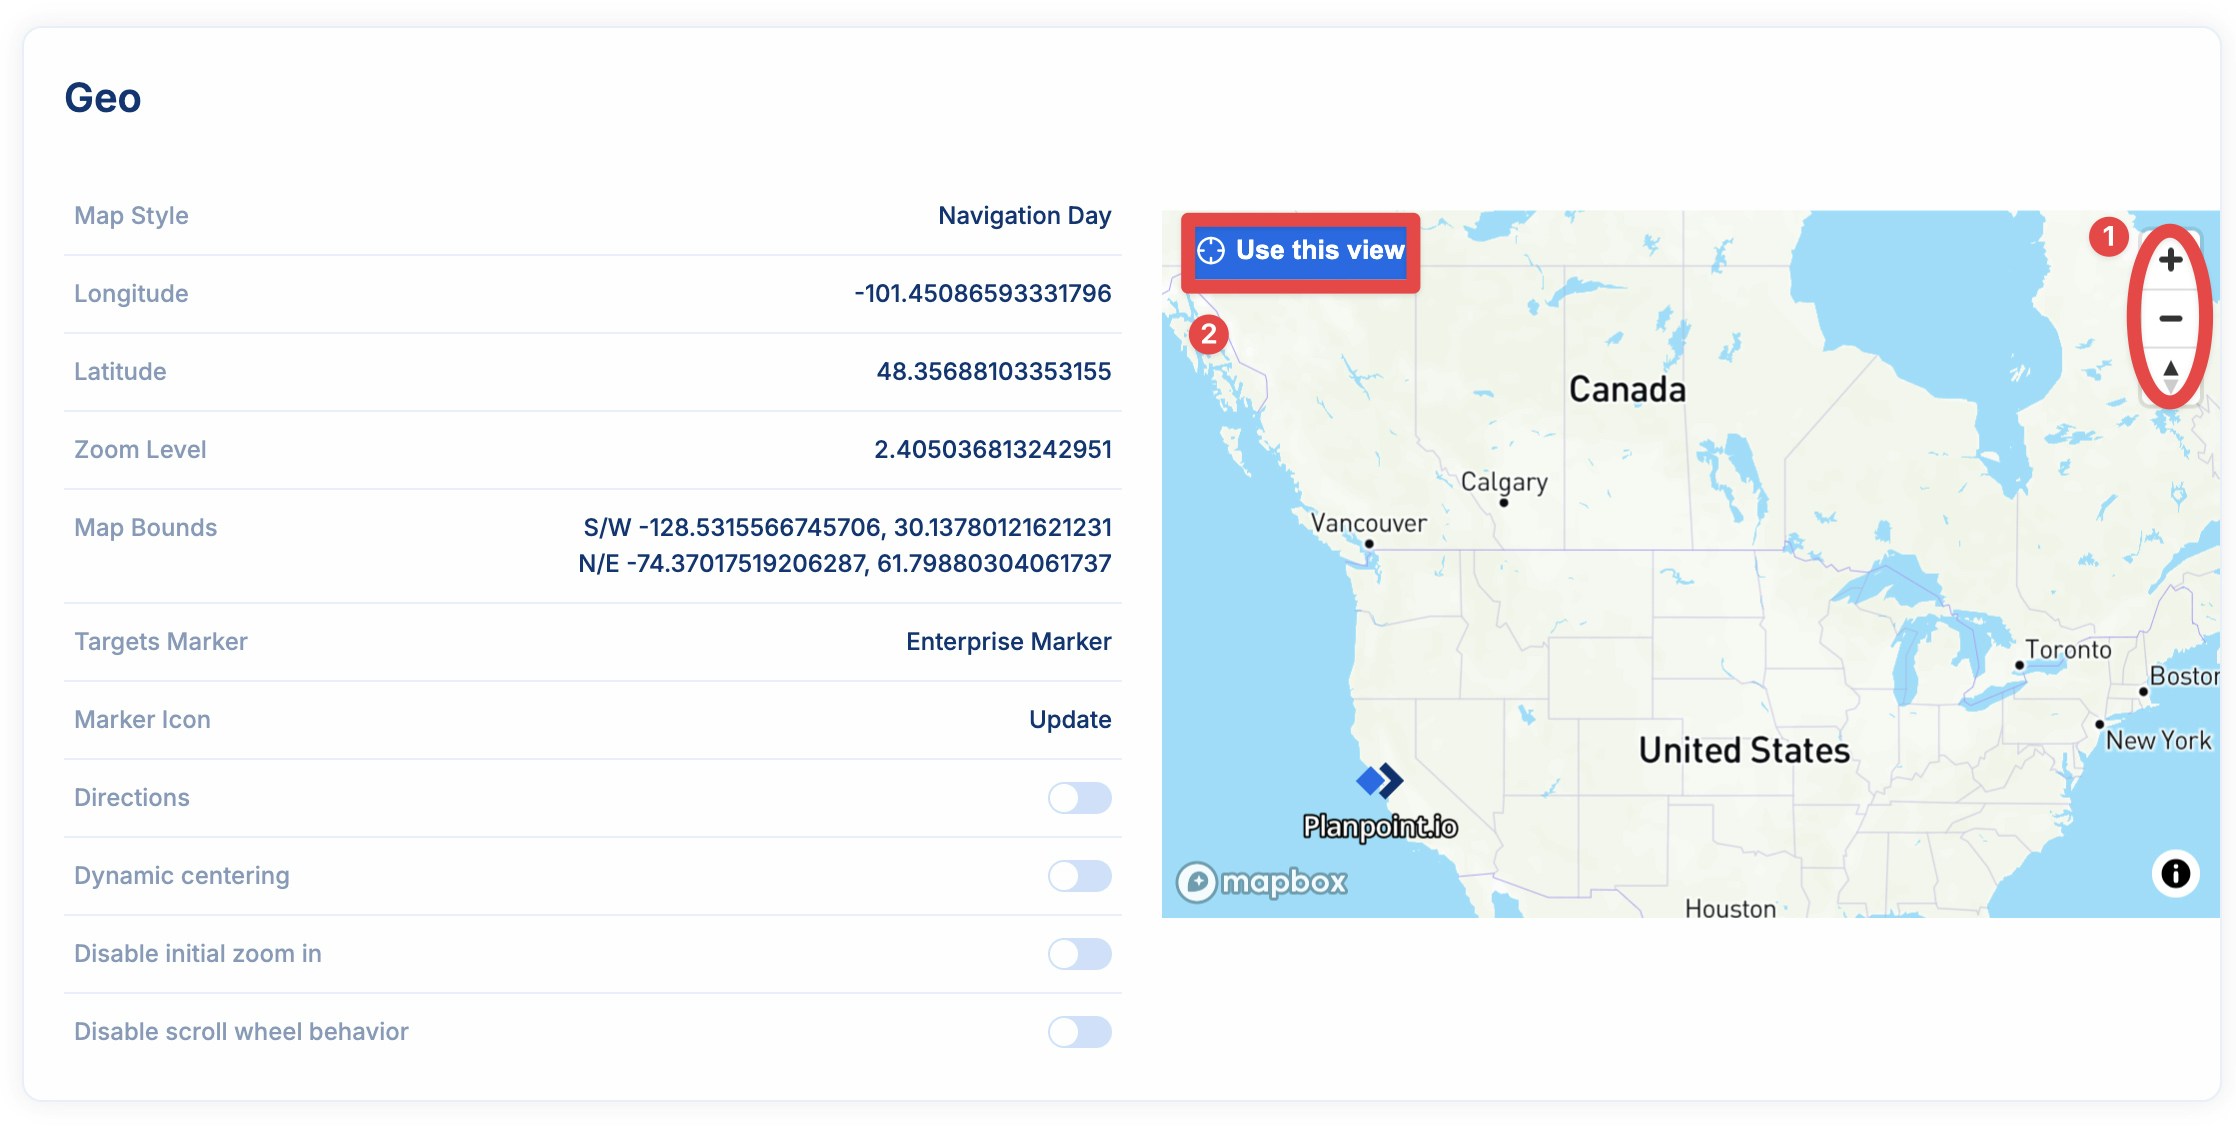
To choose the map to be displayed on the enterprise dashboard, you must set the desired view you want using the map on the right side. Then click on use this view. You can also use the icons on the upper right corner of the map to adjust your map view.
You can choose to turn the initial zoom-in and dynamic centering on or off for your enterprise project
5
Step 5: Searchbox Configuration
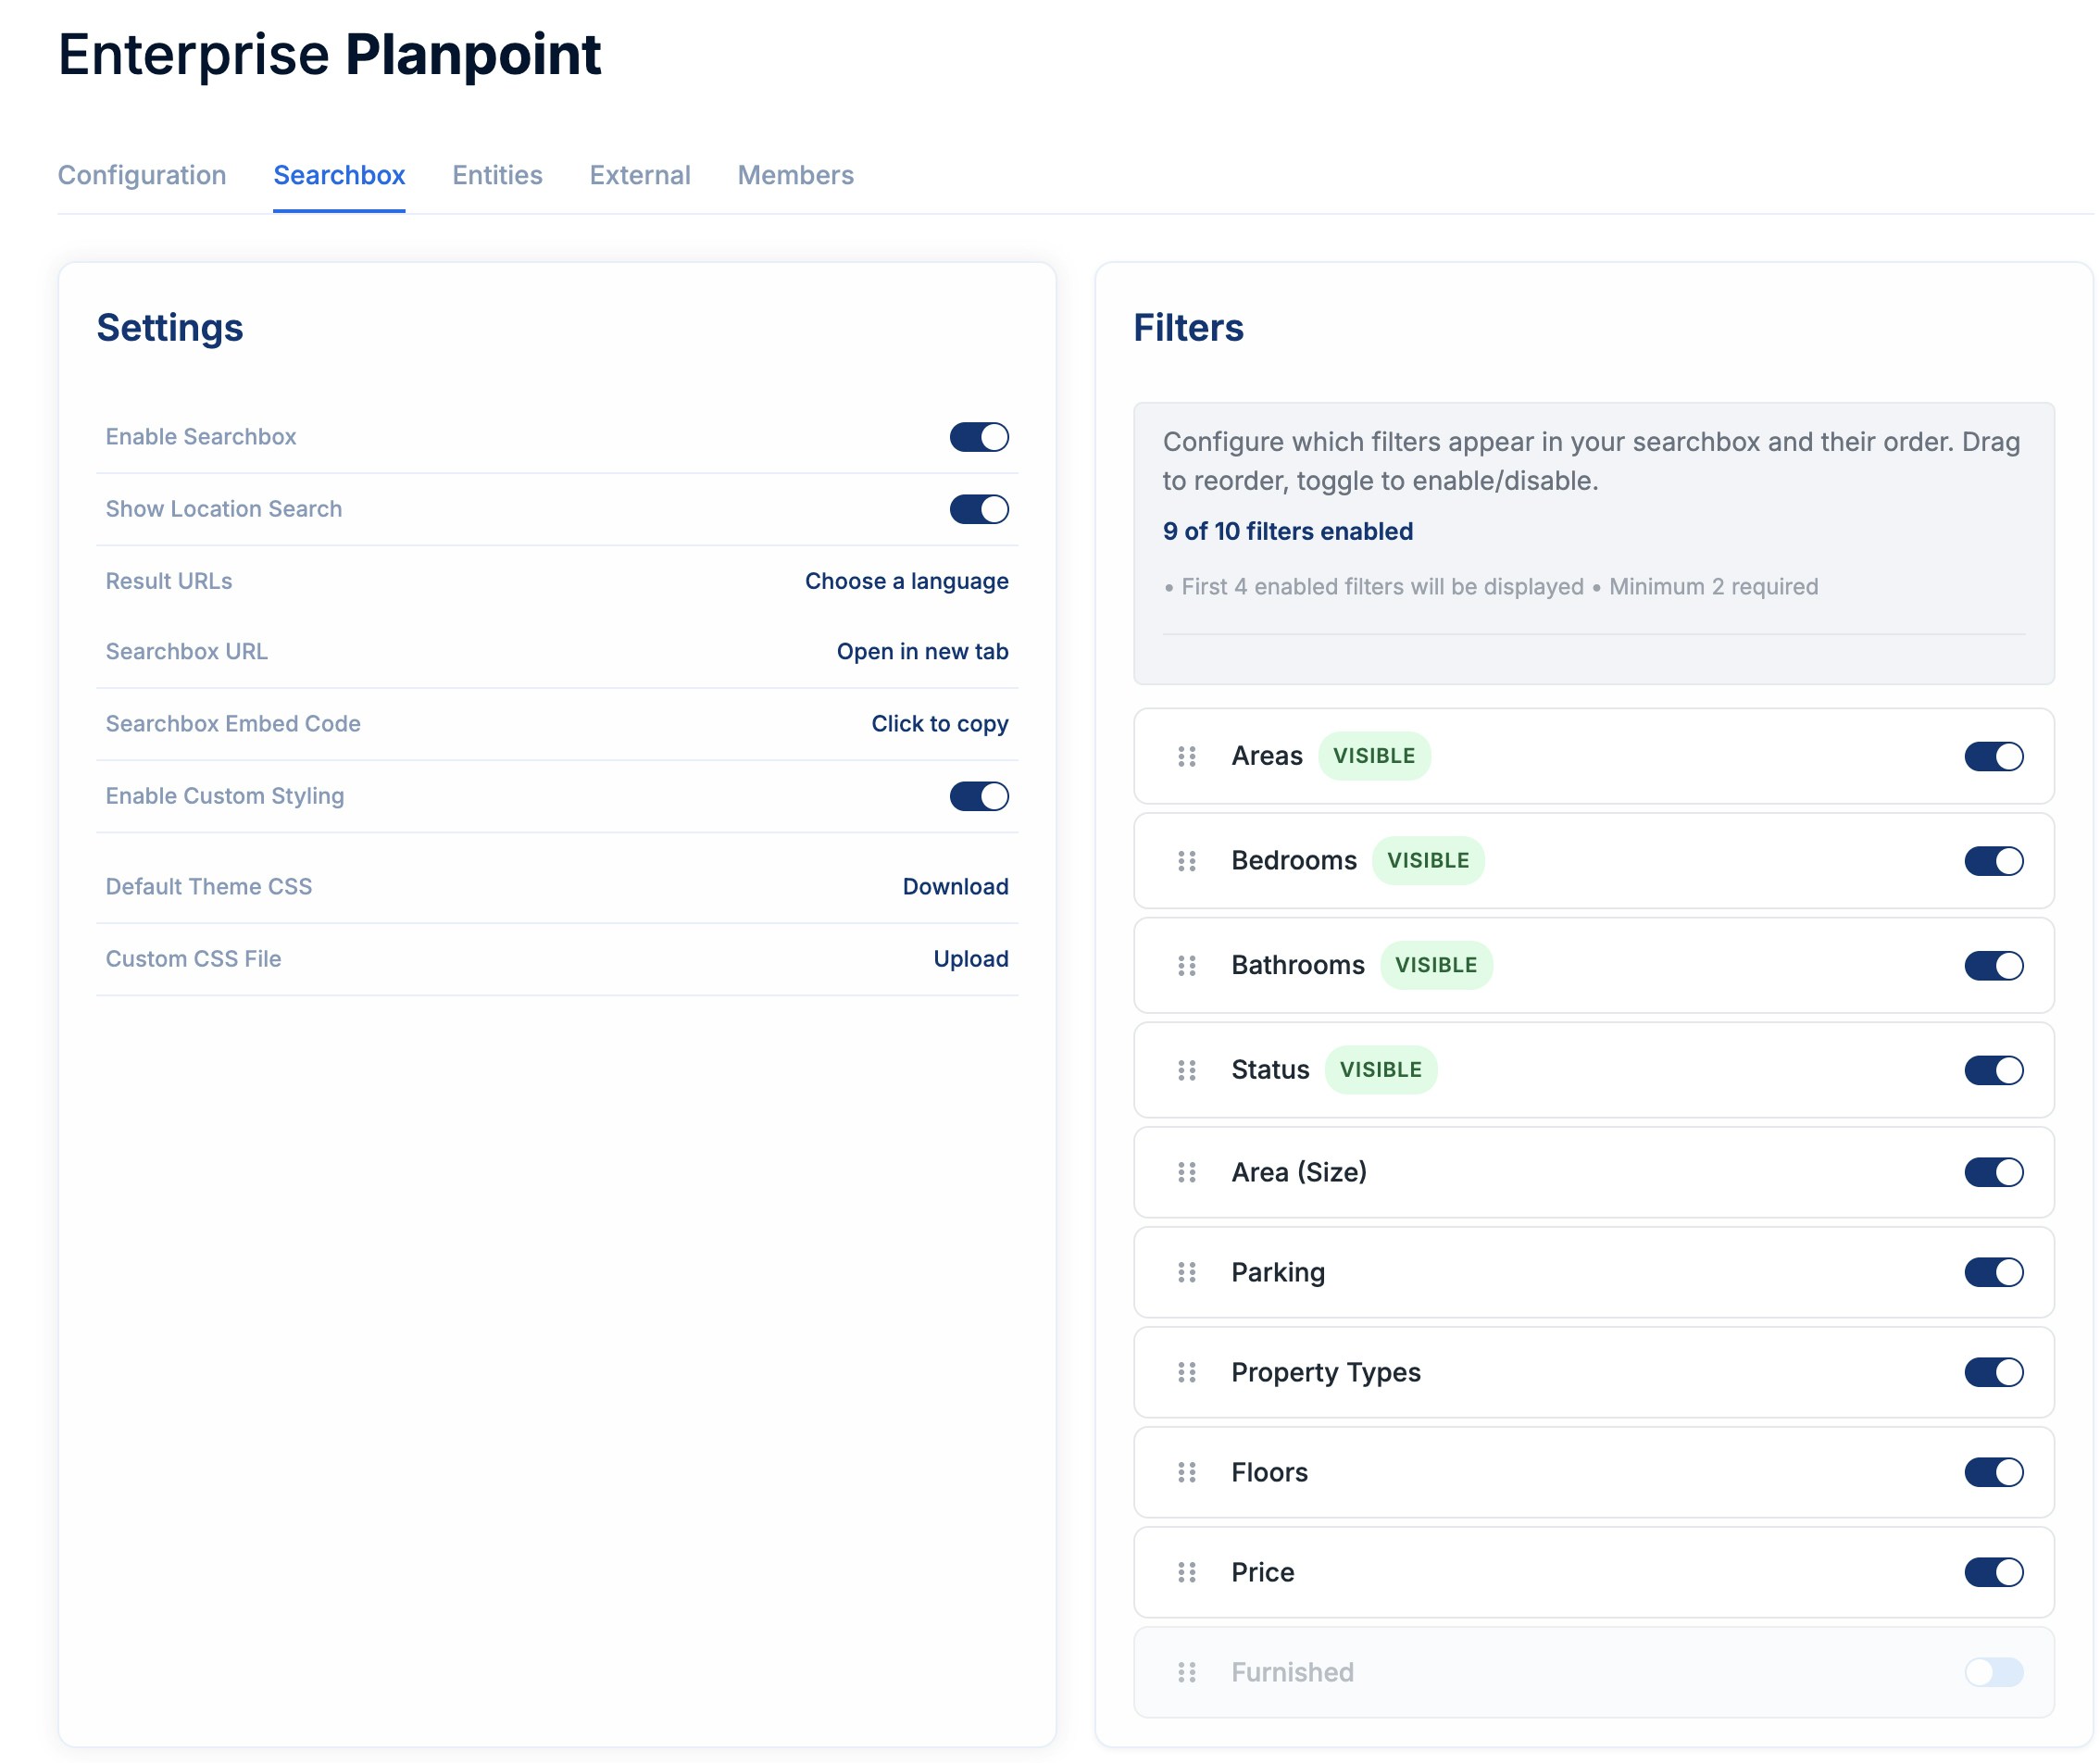
The Searchbox tab allows Enterprise administrators to configure how the Planpoint search experience behaves and which filters are available to end users.This section controls visibility, behavior, and layout of the embedded searchbox used across Enterprise environments.
The Settings panel on the left defines the core behavior of the searchbox:
Enable Searchbox: Turns the Enterprise seaarchbox on or off entirely.
Show Locations Search: Enables location-based searching (e.g. cities, areas, neighborhoods) within the searchbox.
Result URLs: Allows you to select the language used for result links.
Searchbox URL: Opens the hosted searchbox in a new browser tab. Useful for testing or sharing.
Searchbox Embed Code: Generates an embeddable snippet that can be copied and placed into external websites or applications.
Enable Custom Styling: When enabled, allows advanced styling and branding customization for the search box using either the default theme CSS or a custom CSS file.
The filters panel on the right controls which filters appear in the searchbox and how they are displayed.Key rules:
A maximum of 10 filters can be enabled
A minimum of 2 filters is required
Only the first 4 enabled filters are displayed by default in the searchbox UI
Filters can be reordered via drag-and-drop
Each filter can be individually enabled or disabled
6
Step 6: Add projects
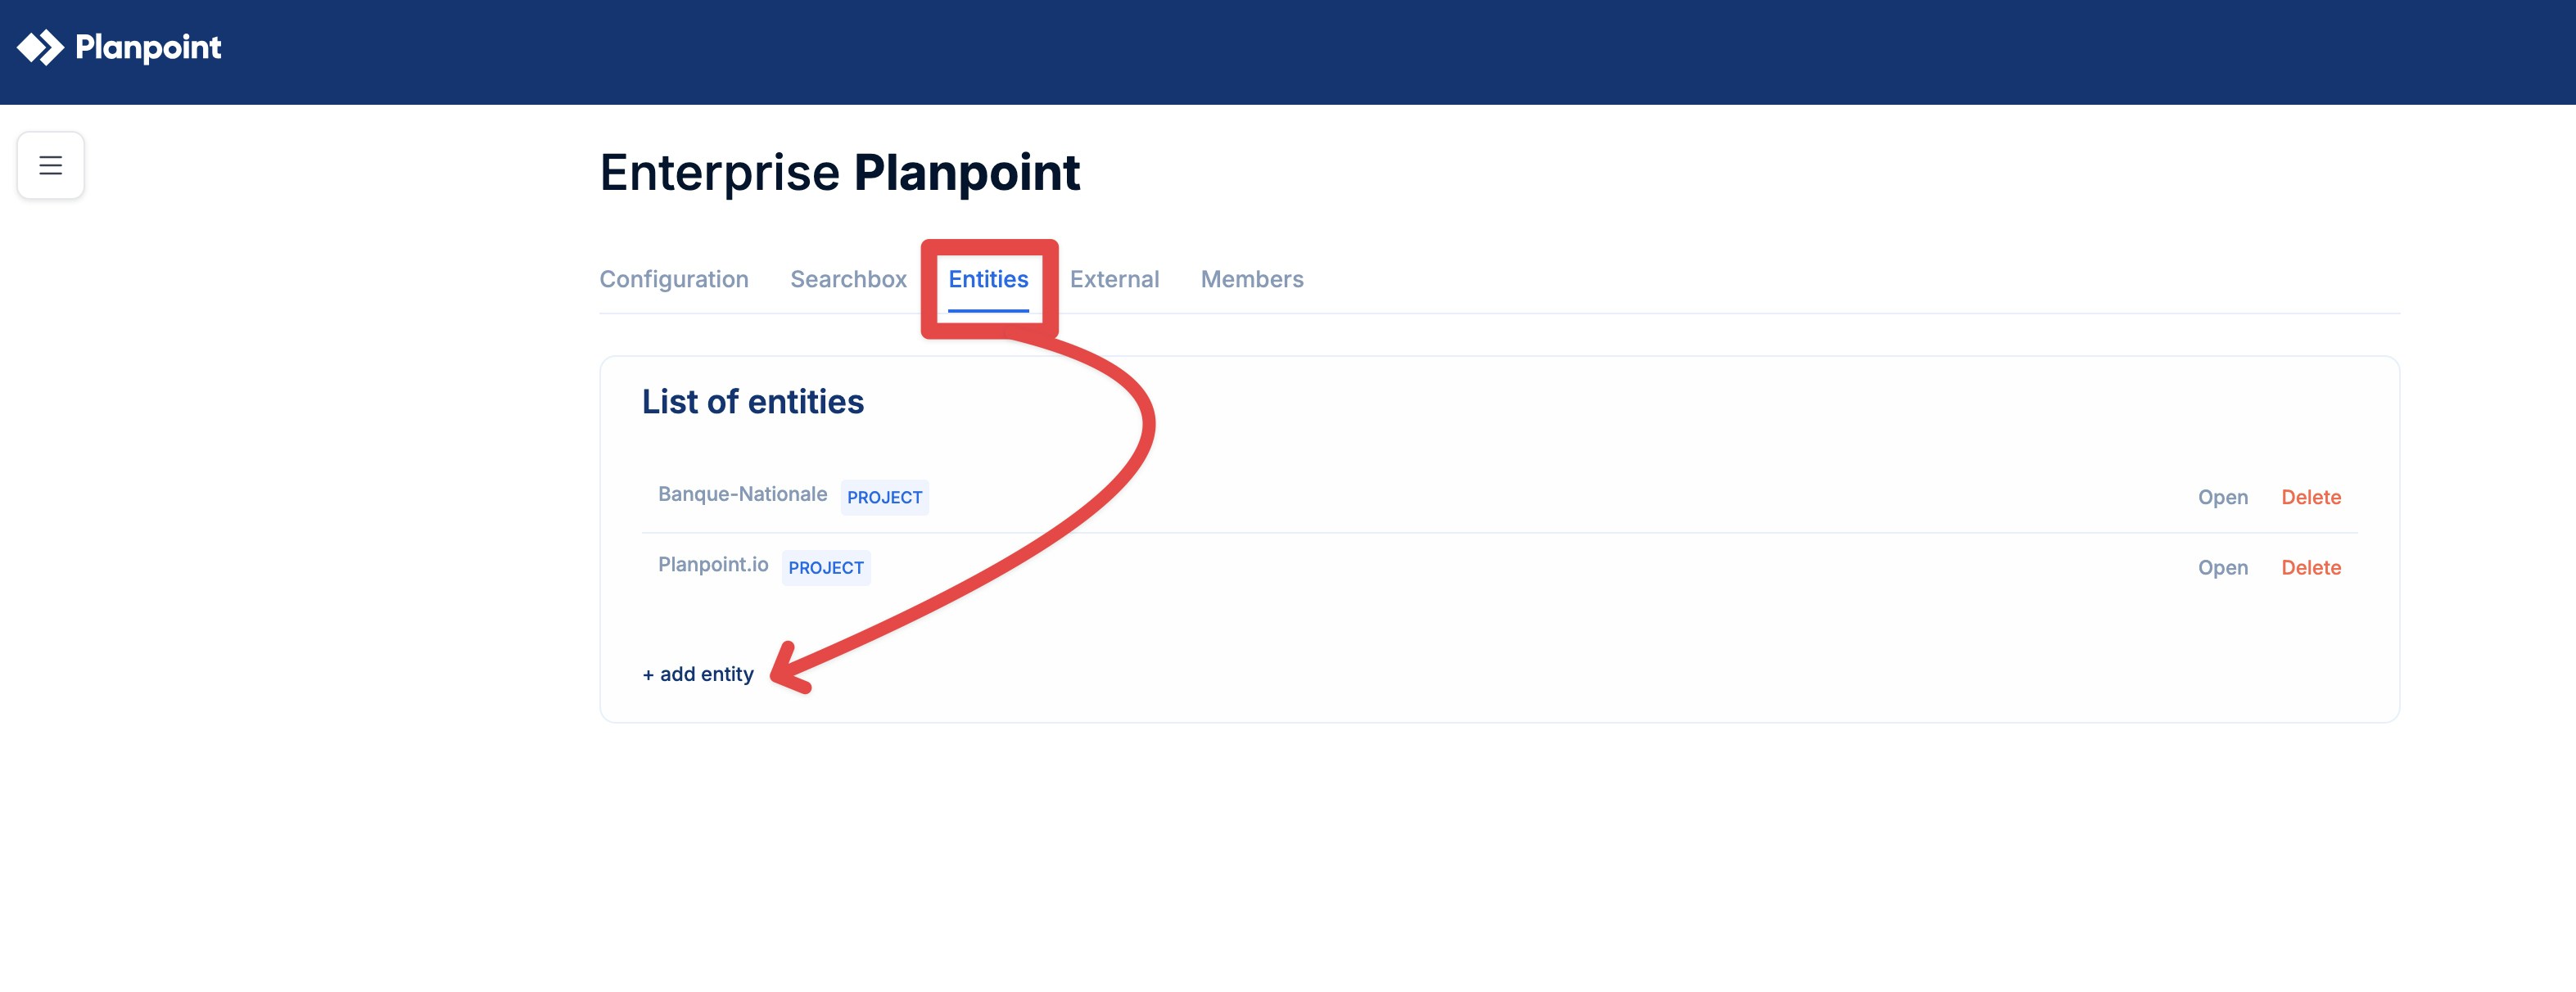
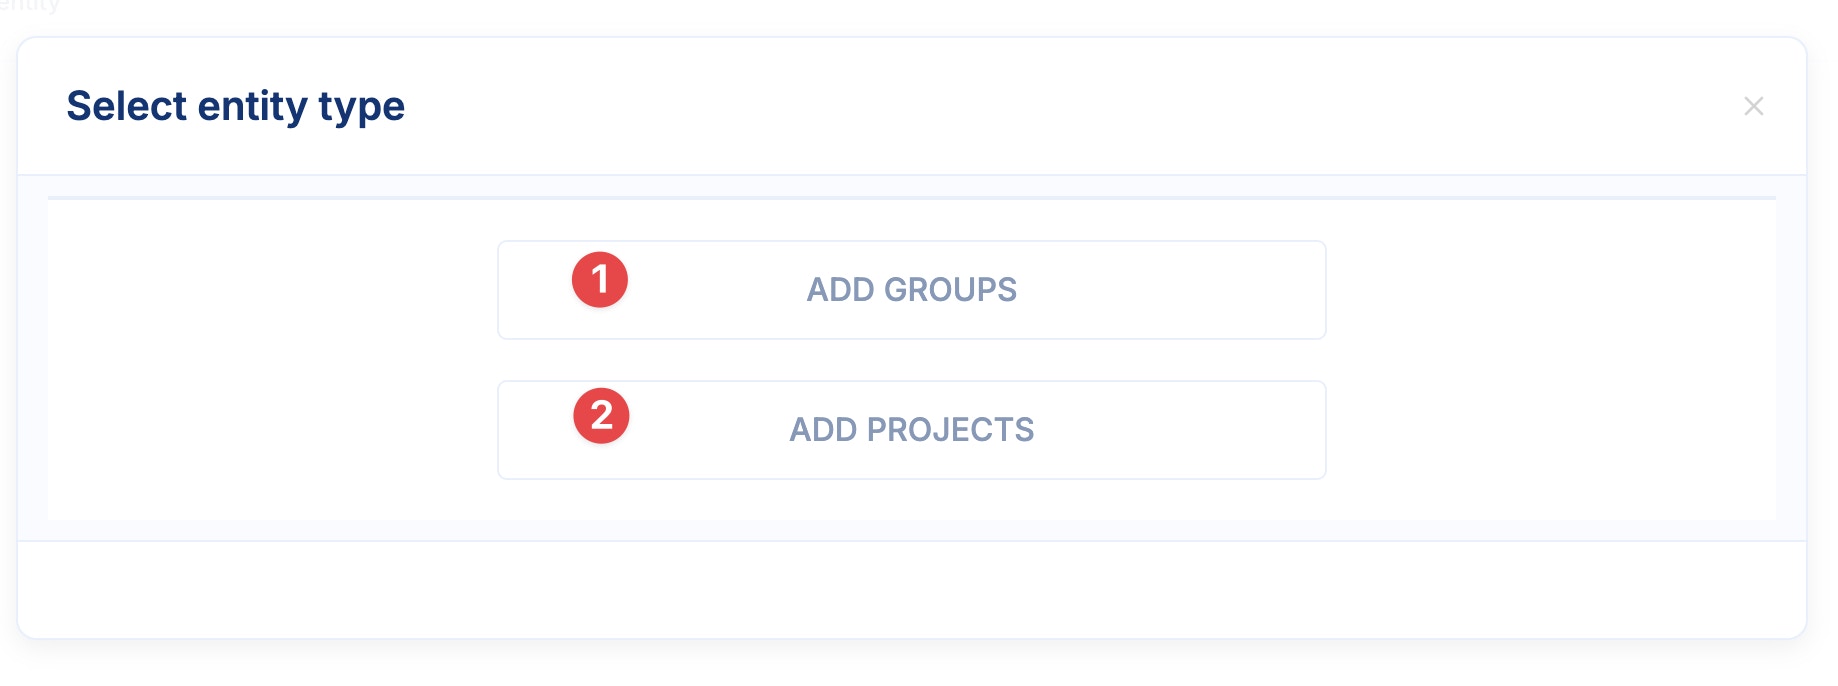
Go to the entities tab to add any project or group project you want.
You can choose between group projects or individual projects. Simply click the section you want to view and select the desired projects. If you’d like to add both types, repeat the process for each section.
7
Step 7: External projects
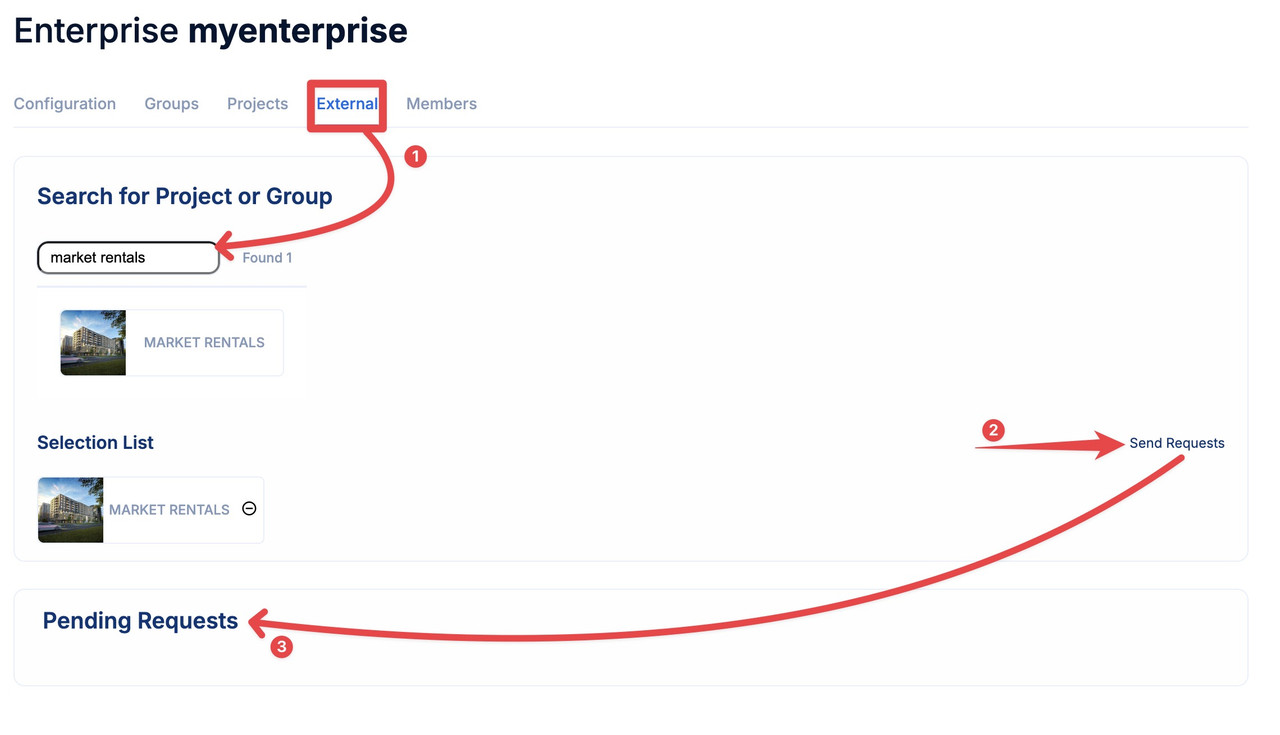
You can also add external projects by searching for them by their name. Simply go to the External tab, type the name of the project, choose the project and send a request. After the request is accepted by the project’s owner, you will be able to add it to your enterprise.
Pending requests will be visible at the bottom of the page
You can also manage the members of your team who can administer or edit your enterprise



 To finalize the project settings, you need to organize everything related to geolocation. Here you can select the map style, the target marker, the map point color and add directions if you wish.